|
Part 4: Finishing the
'Office' |
 |
|
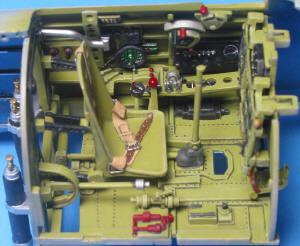
Trumpeter really did a beautiful job molding this cockpit. It is,
without a doubt, the most detailed kit cockpit I have ever seen. I
usually build 1/48 WW II aircraft, adding resin and photo etched parts
to get the results that I desire. These items are not needed for this
kit. The layout matches photos I have found on the web, with only a
couple of differences. First, the wheel to the pilot's left (I assume it
to be a trim wheel) does not have a handle or lightening holes. There is
a hand crank missing next to the fresh air inlet, located on the forward
right side panel. The kit has a small window on the cockpit floor, which
I could not find in any photos. I may over paint it. These are the only
inaccuracies I have found in this beautiful cockpit. I based my detail
painting colors on web photos. The Aotake Green is Gunze Clear Green
over MM Metalizer Aluminum. The enamel wash in the cockpit is a
mixture of the base color, plus black, applied over Future. The flat
coat is Testors Dullcote, and I dry brushed with the base colors mixed
with Windsor & Newton Titanium White oil paint. |
|
 |
|
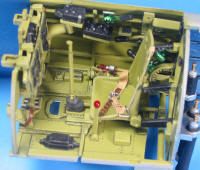
I added a few items to the cockpit. The
belts are made from lead foil, solder, and wire. I made the rudder pedal
straps from lead foil, painted them with Model Master Leather, and dry
brushed them with MM Wood. I added a chain to the trim wheel using
solder, and painting black bands to represent the chain. I also added a
bungee cord for the seat from solder, painted Color of Eagles Tire
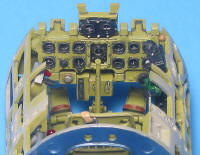
Black. There were a few instruments which Trumpeter did not supply as
film negatives. For these, I scanned the decal sheet of a 1/48 Hasegawa
Rufe at high resolution (9600 dpi.), and enlarged them by 200% in
Photoshop. I cleaned the edges of the scan using the painting tools. When I was satisfied, I printed them out on glossy photo paper. I used
one on the control box below the throttle, and two on the console below
the control box. There is another instrument on the bottom of the
control panel, and one more on the right rear sidewall. For these two, I
used paint. I may scan more decals to replace these, as they are so
different from the rest.
|
|
 |
 |
|
The two sidewalls are a "fiddly" fit. When I
dry fitted them in place,
and enclosed the assembly between the fuselage halves, I found that the
walls want to tilt toward the inner cockpit. To solve this, I will
remove the large tabs on the cockpit rear bulkhead. I will glue the
sidewalls to the floor only, and then glue the walls to the fuselage
sides after the fuselage halves have been joined. There is also some
small flash around the ejector pin marks on the outside of the
sidewalls, and filing these will probably help improve the fit.
In the next installment, I will be assembling the control surfaces,
and joining the main components. I have already joined the float halves. The fit is good, and the panels line up well. I had built a 1/48
Hasegawa Rufe once before, and I forgot to add weight. I made sure I
didn't repeat that mistake. This float is loaded with two rolls of
pennies ! |
|
  |
|
Information, images, and all
other items placed electronically on this site are the intellectual
property of IPMS/USA ®. |
| |