|
Part 6: Wing Tips & Paint |
 |
|
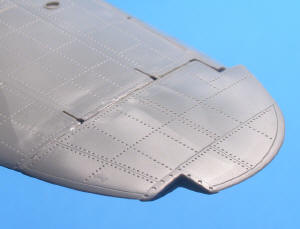
The wingtips, which are molded separately and
designed to be attached with hinges, are not a very good fit. As the
Rufe was adapted from the Mitsubishi A6M2 Type 11, it did not have folding
wings. There is not much surface area to glue the tips to the wings,
so I tried attaching the photo etched hinges for a more solid joint.
They would not align properly, so I clipped the hinges and glued them in
place with CA. The hinge line in the wing top needs to be filled. I
used CA. |
|
 |
|
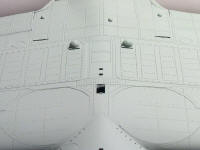
I cleaned up the wing/fuselage seam along with
the wingtips. After thoroughly washing the model with 90%
isopropyl alcohol to remove any oil from my fingers, I painted the
underside of the aircraft. I used the out-of-production Aeromaster
acrylic Nakajima Navy Gray. This color is slightly lighter than
Model Master's Japanese Army Air Force Gray Green. I wish this
paint was still in production, as applies so evenly in thin coats.
The underside looks like the plastic changed color rather than being
painted. Trumpeter's surface detail comes to life with a layer of
paint. I am anticipating the panel lines and recessed rivets to
hold a wash beautifully. Nice job on the molding, Trumpeter!
I still have a couple of areas to touch-up with Gray. (Isn't this
always the case?) |
 |
 |
|
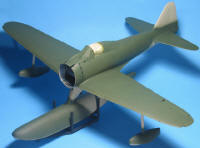
After the Gray cured for forty eight
hours, I applied Aeromaster acrylic Nakajima Navy Green. This color
is slightly more "blue" than Mitsubishi Green. Because of the sharp
angles to the underside of the floats and wings, I was able to paint it
freehand. It took about a quarter of a bottle to paint the green.
I only have a double action airbrush, but I would imagine that a single
action brush would work well on such a large bird. Since I was using
acrylic paint, I could not spray from a distance without running the risk
of the paint drying on the way to the model. It took quite a while
to paint this way. There is a lot of "acreage" to this model! |
|
 |
 |
|
Once dry, I dry fit the main and outrigger floats
for these pictures. The outriggers fit tightly, and don't even
require glue. The main float can be attached with a couple of
drops of CA to the tab that fits to the corresponding slot in the lower
wing. This way, you can paint, gloss coat, decal, wash and weather
the aircraft without having the floats in the way. You can attach
them at the completion of the project without worrying about marring the
finish.
My next step will be the application of Future,
followed by the decals. |
|
  |
|
Information, images, and all
other items placed electronically on this site are the intellectual
property of IPMS/USA ®. |
| |