|
Part 7: Final Assembly |
|
 |
|
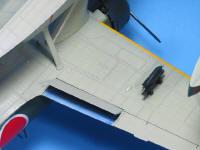
After applying multiple light coats of Future, I began to apply the
decals. They are beautifully printed by Cartograph, and somewhat on the
thick side. Using the Microscale system, they conformed well to the
surface detail. The fuselage Hinomarus ("meatballs") are supplied as separate white and
red discs. The white is opaque, and showed no hint of the underlying
color. These are large decals, and somewhat difficult to move once on
the model. I used a large, soft brush and water to guide them into
position. The most difficult alignment was the yellow wing leading edge
I.D. bands. There is an over-size cut-out for the wing cannon. I
temporarily attached the engine, cowling, and propeller to correctly
align the large red prop warning decal on the main float. |
|
 |
 |
|
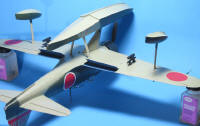
I had to apply the tail band higher than suggested, as it wouldn't
quite span the chord. In retrospect, I could have applied them lower, as
there is an extra decal for each of the thin main float decals. These
can be used to add the to the length of the tail stripe, which would be
easier than trying to match the color with paint. |
|
 |
 |
|
After the decals had dried for a day or so, I washed the model in
preparation for another coat of Future. I do this to protect the decals
from the enamel wash that I use. The wash would not "take" over the
decals. I used a mechanical pencil here, dotting the rivets one by one. The surface scribing on the fuselage (ahead of the "plug" for the
replacement tail) and wing tops were not as crisp as the rest of the
airframe. Much of the wash here is barely perceptible.
To break up the large areas of solid color, I used Future, semi-gloss
and flat coat, following different panels and different rivet lines.
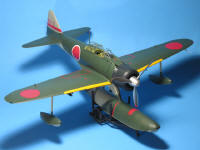
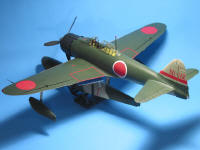
When I was satisfied with the finish, it was time to bring together the
floats, flaps, bombs, pitot, and antenna with the rest of the airframe. All of these parts, with the exception of the main
float, fit well. |
|
 |
 |
|
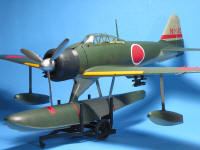
Attachment of the main float was, by far, the most difficult part of
building this kit. The weight that I had earlier added (2 rolls of
pennies) made manipulation difficult. Using CA, I was able to get the
front of the float secured. This left a gap at the rear, which I wasn't
able to close. Installation of the rear float supports ensured that this
gap wouldn't be bridged. You may have better luck, or choose to add a
shim here. Take great care in preparation for this assembly. Even with
all the weight I added to the float, it sits further forward on the
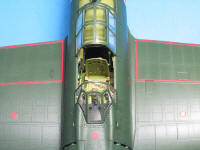
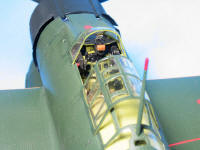
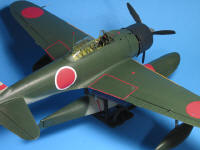
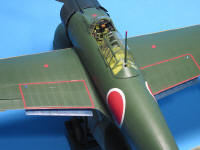
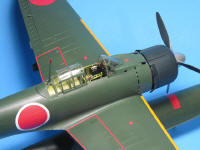
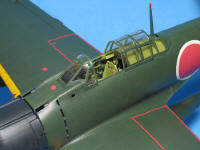
dolly than I see depicted in period photos. The canopy is beautifully thin and clear. There are even recessed rivets
on the frames!
Attaching the engine and cowl assembly revealed another little "glitch." The engine mounting braces kept the assembly too far forward of the
fuselage. I clipped the rear of the braces, and glued the forward
"bulkhead" to the fuselage. |
|
 |
 |
|
 |
 |
|
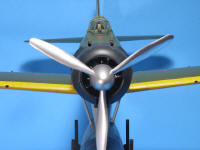
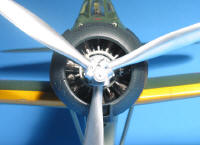
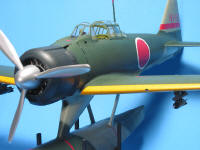
I still have some work to do, which won't be part of this on-line build. I wanted to show the prop hub and counter balances under the two-part
spinner. There are gaps where these two parts meet, so after I
glue, fill
and sand the parts, I'll repaint the prop & spinner and add the decals. |
|
 |
 |
|
 |
 |
|
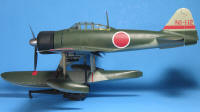
The bombs and racks are simplified, and I want to improve them. The
ladder is incorrect, and I will scratch build a replacement. The
trolley
will benefit from additional detailing. There is also a tie down missing
from the strake at the lower rear fuselage. The Rufe's antenna wire
was attached to a hole through the fin. My #80 drill bit is broken, so
I'll add the antenna wire when I get a new bit. There is also a screen
and adjustment linkage missing from the intake on the main float
support. Trumpeter just gives you an enclosed hole.
|
|
 |
 |
|
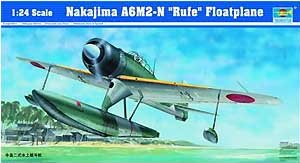
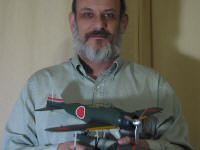
Now, for the $64,000 question. Compared to three-view drawings and other
sources, the top of the fuselage rides a little high. But, does it look
like a "Rufe"? I certainly believe that it does. With its sheer size,
the detail, and no need for aftermarket replacement parts, I feel that
this kit just cries to be built. I would heartily recommend it to anyone
wanting to have a showpiece in their collection. Just make sure that you
have enough room ! I am going to get the carrier version, the A6M2 "Zeke." I think they'll
look great together. Now, if Trumpeter would only produce a 1/24 Me
262... |
|
 |
|
Information, images, and all
other items placed electronically on this site are the intellectual
property of IPMS/USA ®. |
| |