|
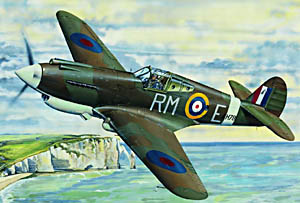
Trumpeter Kit Number 02228 1/32 P-40B |
|
|
Reviewed By Fred Amos, #6672 |
|
|
|
|
|
MSRP: $49.95 USD
When I saw this kit come up for grabs to the Reviewer Corps. I did a lot of groveling to get it. I have been a P 40 fan for many years having built 50 or 60 over the last thirty some years in all scales. Dare I say this is undoubtedly the best of the bunch? Yes, I can say that. However, as good as it is, it has its drawbacks. When you open the very large box you will find four large and one small sprue in light gray and one sprue of clear parts, as well as a PE set of 20 brass parts. There are approximately 170 gray and 11 clear pieces. Let me say first off that I have never built a Trumpeter kit so when I say there are several innovations in the kit; they are at least new to me. This kit is engineered so that the ends of gun barrels are opened up and in the case of the upper deck machine guns there is a hole for the barrels to fit into. This was accomplished by injecting four pins thru the frame of the sprue from the side. Fit of the parts is great with a few exceptions. I warn you now, every slot or hole that a part fits into should be drilled or filed out a little. Let me emphasize the word EVERY. It won’t take much but it will be better done early than after the parts are painted. Construction begins with the engine of course. The engine is so well detailed that it includes all of the plumbing associated with liquid cooled power plants. There are twenty-four pieces to make the twelve individual exhaust pipes. Color notes for the engine agree with Bert Kinzey’s Detail in Scale Volume Number 61. Preceding to the cockpit, the only place where I needed any putty was the ammunition can behind the fire wall. At this point I would suggest that you leave the seat out until after the fuselage halves have been brought together. The reason being you will probably need to putty and clean up the area where the rear bulkhead meets the fuel tank behind it and the seat is sure to get damaged with handling and painting later. Also do not glue the completed instrument panel to the floor yet because you should dry fit (you do dry fit don’t you) the floor and engine assembly to both fuselage halves several times before you commit to gluing the halves together. Also the cockpit sidewalls, be sure they are as far forward as they will go when they are glued in place. I had to file down the edge that meets the rear bulkhead to get the fuselage halves to close correctly. Two small problem areas in the engine and cockpit assemblies. The exhaust stack are over size to scale but there’s not much to do except go for after market parts. Also, the floor of the P-40 cockpit is actually the top of a fuel tank in the wing with large seams and a gas gauge. None of this is in this kit, I did add what I would call a relief tit, (one of those little round things that hang off the end of the smaller parts) to the floor to represent a gas gauge. The PE set is a work of art. It has the three front screens for the radiators, two large blanks for the area under the flaps under the fuselage, gun sight ring on a post and twelve pieces for the seat belts. The instruction sheet has the belts printed on it but I used the foil from a wine bottle. It was white, thin, and took to handling and super glue better than the paper would have. Since the PE set is brass it can be cut with scissors or a #11 blade. The completed engine and cockpit is then carefully fitted into the slots in the fuselage halves, both of them, without gluing until you are absolutely sure that everything fits. And it fits like a glove. Be sure you have the tail wheel bulkhead and the rudder assembly in place and apply liquid glue to the seams. The wing and the stabilizers, which have already been assembled, were glued into place and again the fit is superb. After sanding and cleaning the seams I was ready to attach the clear parts of the canopy. The two side windows fit very well so to avoid liquid glue marring them, I used Future Floor Wax. It takes over night to dry but it holds so well that it can be masked with Friskit. The windshield and sliding canopy are the thinnest clear pieces I have ever experienced and fits very well also. I left the main canopy off and place masking tape to the inside and stuck it to a pop cycle stick, masked of the window details with Friskit and painted the outside of it and all clear parts in yellow chromate so it would show under the camouflage colors. The instruction sheet painting guide furnishes the correct colors for Model Master and Gunze Sangyo paints for a U. S. Army P-40-B or a Lend Lease Tomahawk MK II A. I chose to do the British version with Model Master Enamel’s. The suggested colors worked well except that the bottom color was called as Model Master 1731 which is a gloss Grey (ADC Aircraft Grey). I chose to use Model Master 1728, Light Ghost Grey. You have airbrushed before so I will spare you the details. After painting I applied a good coat of Testors Gloss Coat to prepare for decaling and to protect the finish during handling. The maker of the decals is a mystery. They are in perfect register and the colors look as good as I would have hoped for. I cut the white tail band from the sheet first, soaked it hot water and let it set for thirty seconds or so while I brushed on some Micro-Set. As I slid the decal off the paper I could see it stretch. To me this means it is very thin. I placed the decal close to its location and tried to move it with a brush, it wouldn’t move. I flooded the area with setting solution and it still wouldn’t move. I lifted it with my fingers and it folded up on itself. Too thin. I put the decal back in the water, and floated the decal to the paper with two brushes and tried to pull the wrinkles out of it. I got about 90% but the rest wouldn’t come out. Since there were no other decals on the model, I decided to mask off the area and paint it. When I got back to decaling I didn’t use the setting solution, just water. I had no more problems, the decals went on just fine. I applied a light coat of Champ setting solution and they sucked into the detail just as if the decals were painted on. There are several small clear pieces for the navigation lights on the wings and rudder. They are so small that I decided not to attempt using them. Instead I resorted to another method. I put a little Micro Kristle-Kleer in a bottle cap and mixed in a small amount of Gunze Sangyo Red Madder and Metallic Blue Green, and then carefully placed this into the holes and built it up as it dried. This sure beats fighting the clear parts. Next I put on the rest of the small parts; landing gear and doors, gun barrels, pitot tube, etc, with super glue. Then a couple of coats of Testors Dull Coat to flatten the paint and decals as well cut the sheen from the super glue. Last but not the least I placed the antenna lead wires. This kit has a detail I have never seen on any other P-40 kit, the correct antenna mounting plate on the leading edge of the fin. I drilled a very small hole thru it and at the place thru the wings where the wires are attached. I ran a piece of clear invisible thread thru the bottom of one wing, thru the rudder plate and thru the other wing. I tied a knot in the thread under one wing and pulled tight on the loose end and taped the thread to the wing. A few drops of super glue applied with the open eye of a needle at the points where the thread goes thru the holes held just fine. After the super glue had set up (give it several hours) I carefully sliced the thread off on the bottom of the wings with a # 11 blade and applied a little Dull Coat with a fine brush. Well, there it is , finished. As I said earlier, this kit is the best P-40 I have ever built but it does have its draw backs. On the plus side, it is loaded with detail. But after it is assembled you can’t see it. There are several serious omissions and downright blunders. The most serious blunder is the ailerons. The way Trumpeter has them designed they both droop down when they are put on. Fortunately all you have to do is cut the tabs off and put them on in a neutral position . A less irksome but still a problem is the pitot tube. The kit comes with only the American style tube and not the British style, even though one of the decal options is a British Mk IIA. All in all, this is still a good kit. The price is a little steep at $50.00 US but if you want it bad enough you will get it. I wouldn’t have any problem buying one for myself. This kit was provided to the IPMS/USA Reviewer Corps. by the distributor, Stevens International. I want to thank John Noack for allowing me the honor of building it for review. |
|
) |
) |
|
|
) |
|
Information, images, and all other items placed electronically on this site are the intellectual property of IPMS/USA ®. |
|
)