|
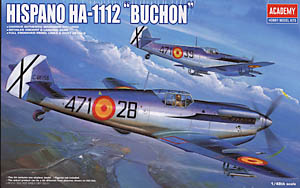
Academy 1/48 Hispano Ha-1112 "Buchon" |
|
|
Kit Number 12203 |
|
|
Reviewed By Floyd S. Werner, Jr., #26266 |
|
|
|
|
|
MSRP: $20.00 USD The History- An airframe whose outline became representative of a nation and an engine who powered it’s primary rivals. Sounds like a match made in heaven. Spain received the rights to manufacture the Bf-109 airframe but like many countries after World War II it did not have the engines to power these airframes. Spain tried to power the Bf-109 with an indigenous engine, the Hispano-Suiza. Dubbed the Ha-1109, this distinctly Spanish version of the 109 went through two different versions. This arrangement was not satisfactory and another engine had to be found. With the end of hostilities there were plenty Merlin engines to be had. The Merlin engine had powered the Mustang, Spitfire, and Lancaster during the war, but in 1951 there were plenty to be found and the engine that won the war was mated to the airframe that lost it. This version became the Ha-1112, Buchon. Equipped with two 20mm cannons in the wings and eight 80mm rockets under the wings the Ha-1112M1L was the final production version of the Spanish 109 variants. Equipped with a four bladed prop, the Spanish government continued to fly the Buchon into the 1960s with production ceasing in 1956. Phased out of service in the 1960s, the Buchon was given a new lease on life by the producers of “Battle of Britain” who restored 17 aircraft, including a few two seaters, for the making of the movie. This one occasion has given the world the majority of 109s that we see now. Many have been reengined with the original German engine, but there are still quite a few Merlin powered 109s attending airshows throughout the US and Europe. Many will question if the 109 was a successful design, but any airframe designed in 1933 and still flying in front line service in 1963 would have to be classified as highly adaptable and successful. The Model- Upon opening the box you are greeted with three sprues of light gray plastic. There are four clear sprues. You get the typical Buchon cockpit, ala Bf-109G-6 standard. You also get an Erla hood and an Avia S-199 hood, these of course are not used on this model but it is nice to have extras. The decal sheet is beautifully rendered and in register. The instructions are nicely set up with plenty of assembly illustrations. Panel lines are nicely engraved and are very delicate. This kit is the old Hobbycraft kit, but it is better, than the original release. The plastic is of a better quality and the decals are nicer than the Hobbycraft kit. The clear parts in this kit are actually clear. My Hobbycraft canopies were completely unusable. What I’m trying to say is that this kit is a lot better than the original release. On top of the better plastic, clear parts, and decals you get the extra clear parts for the Avia and Erla. Let’s get started Cockpit- As I wanted this kit to be an out of the box build, I used the kit cockpit. Actually the kit cockpit is very nice. It is missing the yellow gas line over the fuse panel but the rest is pretty nice. When painted with RLM 66 and a dry brush of RLM 02 and some silver chipping the cockpit looks very nice. One thing I noticed in my research was that the gun cover is installed according to the instructions, but the actual aircraft as far as I could determine, did not have this but you will have to put something there. I elected to use the Hobbycraft method of putting the cover on backwards to fill the area. It worked for me. Fuselage- The fuselage went together beautifully. No big problem areas were noted. Don’t forget to paint the radiator with either black or a dark grey. The scoop is the proper shape, but the top of it doesn’t fit the taper at the top. This is easily filled with filler. I used epoxy putty for this job as I find it easier to shape and would require minimal sanding. The fuselage has the holes opened for the direction finding antenna on the belly. My research indicated that the particular aircraft I was modeling did not have this bulge but I used artistic license and add it because it is different. It could have been there during it’s life span as the provisions are in all the Buchons. Is this cover the same as the one found on some Emil models? Wings- Before assembling the wings you have to decide what you want for under wing ordnance. You will have to open up the appropriate holes. You have to open the holes for the wing strakes, wheel bulges and the rocket rails. Be careful on the wheel bulges as Academy has you open the holes for the large and small bulges. Only the small bulges were fitted as far as I could tell. Don’t forget the shell ejector holes, which I used a drill bit on and then carved and filed to the proper shape and the holes for the mass weights. The wing can be joined as soon as you paint the radiator faces. The fit of the wing was very good, with no filler needed. Now remember I use superglue to fill the wings and fuselage seams. This is not because of a poor fit it is just my technique to speed the building process. Dependent on your resources, there are additional panel lines that are not depicted on the model, both fuselage and wings, that I scribed in at this time. Nothing big, all of them were straight lines. Check your sources though. I may be wrong. Tail- The horizontal tail surfaces represented no big deal. The horizontals were sanded and inserted in the proper spot. The fit was perfect. Bring it all together- Joining the wings to the fuselage proved to be no big deal. The fit was good at the front and back but the area around the fairing in the center needed some work. I inserted a plastic plug at the apex of each wing. This caused the wing to spread open a little bit more and this was enough for the wing to match the airfoil shape of the fuselage and no filler was needed. If I had to do it again I would have sanded some off the wing to get more angle of dihedral, but without it the results are quite acceptable. One thing that is different from this kit to other109 kits is the additional bulge from the engine area that fits over the wing. The fit was good, with just a little filler needed to smooth everything in. Once the wings are attached I put on the wing bulges, guns, and the wing strakes in that order. The wing guns fit ok, 4mm from the panel line, but they did need a little bit of sanding with a half round needle file to get a proper fit. Nothing drastic but it did require five minutes of cleanup. Once attached a bead of Mr. Surfacer 500 around the outside smoothed the gun fairing in. Getting ready for the paint- About this time I added the landing gear struts. As the whole bottom of the airplane, including the landing gear and wheel wells were painted the same color. This greatly aided the painting process. First major problem with the kit emerged now. Because the cockpit was basic, but still good, I thought I would have the canopy closed. I attached the canopy with white glue. The Academy canopy was too small in width and height. No matter what I did I could not get an acceptable fit. I tried to fill it with filler, Mr. Surfacer and white glue, but nothing made it look good. Rafe Morrissey finally convinced me that I would not be happy with the canopy as it was, but what to do. After much debate I decided to remove the canopy and all the filler. It took a little bit of effort but the canopy broke off with no damage to the kit or the canopy. I sourced a Hasegawa canopy from a G-6 kit which I happen to have a few of. The canopy would fit just fine. Only the front canopy would have to be modified. I had to saw off the side panels and trim the front to fit the Academy kit. If I had to do it again I would cut the kit prior to adding the cockpit and use the Hasegawa canopy with the side panels and front left intact. Oh well, live and learn. So much for being Out Of the Box. While I had the canopy off I added some Eduard prepainted seatbelts. I was initially going to add tape belts but was in such a hurry that I forgot so I had the chance to fix it now. As a side note, if you have the canopy open I think that most of the fit problems will go unnoticed or at least become manageable. Now that that was dealt with I masked the new canopy with Black Magic masks for the Hasegawa kit. They worked beautifully and cut the time for this tedious task down to next to nothing. It was time for a quick RLM 66 prime to the canopy area and then a coat of Tamiya primer fine (white) was sprayed over the entire model. This was sanded down with some Micro Mesh sanding paper and any areas that needed cleanup were dealt with then. Painting- Using my Tamiya airbrush a coat of Alclad Dura-aluminium was sprayed over the entire top of the model with a pressure of 5 psi. Yes, you read correctly, 5 psi. This prevents any chance of blushing or paint going where I didn’t want it. Once that was done the model was post shaded with Alclad Dark Aluminum on the panel lines. As the real aircraft finish was not actually natural metal but painted aluminum this would add some depth later. Once I was happy with the results I masked off the upper surface with Tamiya tape in preparation for the light blue bottom. The blue for the bottom was a Tamiya Light Blue cut with some flat white. The exact proportions were not important to me. This was sprayed on the entire underside. Touch ups had to be made here and there, but the results were very pleasing. I decided that the black swoosh behind the exhausts should be painted on. I didn’t think the decal would look as good as I could make it. I used the decal as a template for the actual swoosh. While I was at it I thought I would paint the tail cross and the arrow for the starter handle as well. Painting the tail Tamiya Flat White and carefully masking with Tamiya tape had me ready for the flat black. These two areas were painted Tamiya Flat Black. Again some touch up and I was happy. Somebody once told me it isn’t how bad you screw it up, it is how gracefully recover. The prop blades were painted Alclad Dark Anodized Grey with RLM 04 tips. The rockets themselves were painted Tamiya Flat White. A coat of Tamiya Spray Can Clear and I was ready to tackle the decals. Decals- The decals looked great on the sheet, well within register and the colors looked perfect. You get markings for an operational Buchon and a restored “modern” Buchon. The modern Buchon would require some additional parts such as cowl gun bulge replicas and different wing guns. That didn’t bother me. I personally would have kept the silver/blue aircraft and would have added decals for an all blue operational Buchon or a “Battle of Britian” movie machine. The decals went down nicely, but as they dried the second big issue with the model came up. The insignia with the colors, most noticeably the national insignia, did not set well. You can tell that the decal has micro air pockets under it. The model was about as smooth as you can get it. This happened on my Academy P-47 too. The decals on that model eventually pealed up. I did not seal those decals but these are sealed so we’ll see how they hold up to time. The markings with a single color didn’t have the same issues, such as the numbers. I used both the MicroSol and Set system and Solvaset on the decals. The Solvaset seemed to work better of the two systems. I decaled a dark blue stripe on the rockets. I could find no reference photos of an operational rocket so dark blue decal it is. It added some more color to the airplane. Once the decals were dried and no setting solution would make them adhere any better, I sealed everything with a coat of Tamiya clear and then a coat of Model Master Acrylic Flat. Weathering- I kept my weathering to a minimum on this pretty airplane. Right or wrong, it was too pretty to dirty up. A wash of Burnt Umber artist oils was flowed into the panel lines and that was about it. A coat of flat was added over the entire model. Final details- I removed the masks and the canopies were perfect. I highly recommend the Black Magic masks. The small parts were put on at this time. I drilled out holes in the end of the rockets, but this was really mute as the back end is covered by the launcher. The direction finder was added to the belly. I drilled a hole for the vertical antenna. Academy has you use the typical vertical antenna mount but my research indicated a whip type antenna in that spot. I used a piece of stainless steel wire, .0005. It was very thin and strong enough to stand up. An antenna was added to the top of the tail to the spine and the model was done. Conclusion- This kit is a very nice addition to any 109 family of models. I enjoyed building it a lot. It took no time at all to get a wonderful model. The kit goes together real well, with the exception of the canopy. The clear parts are far superior to the Hobbycraft ones, even if they are still too small. Again, if you open the canopy this issue will be minimal. An option is to do like I did. If you have the Hasegawa kit, they normally provide multiple canopies so reallocating one of them is not a big issue. The model looks very nice and looks every bit a Buchon. It looks funny, in a good way, in the display case with a four blade prop and colorful paint scheme and rocket launchers. The decals were ok, as most were useable. If I had to do it again I would have gotten replacement decals for the national insignias. The rest were useable and quite acceptable. While having it’s origins with Hobbycraft, this model is an improvement over the original release in that the all plastic is much better. The decals are still better than the original release in clarity and colors. It is nice to get the extra canopies, that do fit the other kits by the way, and the spare parts. Despite the two shortcomings, I highly recommend this kit. It is a very nice model and leaves the modeler with many options. The price is very reasonable and a bargain in the fun department. I will have to add a Battle of Britain bird and an all blue Buchon to my collection. Remember: Modeling is fun! The kit is available through most hobby shops. I would like to thank Academy for the review sample. References- Monographico Aereo H.A. 1112-Mil “Buchon”, Pedro Miquel Paniagua Magan, Monograficos Aereos, ISBN 84-921179-07 Avions- Les Messerschmitt Espagnols- Hors Serie No.5, Juan Arraez Cerda, Editions Lela Presse, ISBN 1258-2700 |
|
) |
) |
) |
) |
) |
) |
|
Information, images, and all other items placed electronically on this site are the intellectual property of IPMS/USA ®. |
|