|
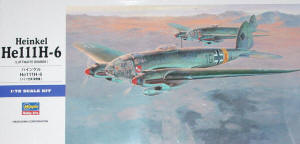
Hasegawa Kit Number 00551 1/72 Heinkel He-111 H-6 |
|
|
Reviewed By Dave Morrissette, #33653 |
|
|
|
|
|
MSRP: $42.95 USD Hasegawa continues its great slate of releases with a 1/72-scale version of the famous German He-111 bomber from WWII. Three schemes are included in the kit; all are Russian Front aircraft with RLM65 Blue undersides and splinter RLM 70 Black Green and 71 Dark Green tops. The kit is molded in Hasegawa’s standard light gray styrene with very nice recessed panel lines and clear parts. Parts breakdown indicates future versions to come. The canopy is in multiple pieces, and the engine nacelles are separate from the wings. There are also some unused parts on the tree hinting at future variants. The modeler building this kit has several configuration choices. There is a complete bomb bay and the doors can be posed open, or you can go with SC1000 bombs hung under the fuselage. There are different exhausts between versions 1/2 and version 3. There are also several holes to be opened in the wings. Overall, not too many choices so I chose scheme 1 from KG27 in Russia in the spring of 1942. It has nice yellow wing tips and good group insignia. Construction starts with the cockpit and bomb bay - 17 pieces, and all are nicely done. I added some masking tape seat belts, as the cockpit is very visible through the greenhouse nose. There are few ejector pin marks in the cockpit, but most won’t be seen. I painted the cockpit RLM66 with a good wash and dry brush. The bomb bay has the bombs in it and is very nice but is almost impossible to see if you pick a version which has the windows painted over. The rear bulkhead and cockpit assembly fit great when I closed the fuselage, but I left the tail wheel off - it can be added later and would only get in the way. The assembly of the wings and tail were without any problems, including construction of the nacelle that took only a little putty to fair into the wings. Overall fit is great for this kit. I decided to open the bomb bay. Hasegawa supplies the bottom of the bomb bay as an insert in the fuselage that fits well and looks convincing. The bomb bay doors will need to be cut to open them, but no big deal. I also attached the gondola to the bottom. It’s molded in clear plastic, and very nice. Fit was also great on this part. I placed the guns in the gondola but in hind site, I could have used tweezers and installed them through the top after I was done. Overall, the kit was a gem so far in that after about two days, I had most of the airframe almost ready for paint. The nose is a little different story. The instructions would have you build the 5-piece clear nose the then add it to the fuselage. I tried and after much frustration, gave up on this method. The nose consists of a top, bottom, rounded nose, top hatch and a small side panel. Try the following method - mask all the panels first. I didn’t and yikes was it difficult when I did it with the canopy assembled. (Also, Meteor and EZ Masks, this is a wonderful opportunity for a great masking set!) Then glue the top canopy and let it dry. Add the bottom and let it dry. Add the side, front and hatch and the entire thing fits wonderfully. I only used a slight amount of Elmer’s Glue to fill a small spot. Painting was straightforward – I used Xtracolor enamels on the kit and it painted up wonderfully. There is a fair amount of masking due to the paint schemes but that’s what makes it neat. Once the paint was dry, I decaled directly over the paint and had no problems with silvering although the yellow fuselage band was not opaque enough and should be painted and not decaled. I would also like to compliment Hasegawa - the main gear are very finely done and cast and look great. I added the landing gear, antennas and props, flat-coated the entire thing and then followed with the clear parts and this little beauty was ready for the shelf. This is a great little kit and I want to thank Adrian Leung, Dragon Models, John Noack and Hasegawa for the opportunity to review this gem. I cannot say how nice it is except to tell you that it took about 8 days to get this done, start to finish and this is because of the wonderful fit. Needless to say, I recommend this kit highly especially to all Luftwaffe fans; it was a joy to build. |
|
) |
) |
) |
) |
|
Information, images, and all other items placed electronically on this site are the intellectual property of IPMS/USA ®. |
|