|
Pacific Coast Models 1/32 AerMacchi C.200 |
|
|
Kit Number 32001 |
|
|
Reviewed By Dave Morrissette, #33653 |
|
|
|
|
|
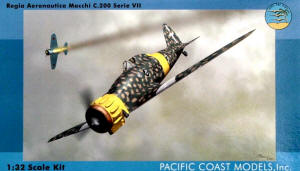
MSRP: $49.95 USD Pacific Coast Models and Ken Lawrence have followed the release of their 1/48 scale C.200 with this 1/32 scale version. Let’s take a look at what’s in the box. The kit is a scaled up version of the 1/48 kit, and is a multimedia effort. Fuselage, wheel covers, wings, some cockpit and undercarriage parts are injection molded and were produced by MPM. Resin detail parts included the cowling (which is a work of art in a single piece), cockpit detail parts and the engine. Also included is an Eduard photo etch fret with seat belts, instrument panel and oleos. Detail on the resin is excellent and the engraving on the fuselage is nicely done. Canopy is vacuum formed and there are two. I am doing this build straight out of the box. That being said, it is a limited run kit and OOB does take a little extra work but the results can be striking. The build started with the cockpit. I recommend that you get a slow speed Dremel tool ready with a fine tooth saw blade as it will help with separating all the resin parts. One other quick tip is that when I am building with resin, I try to get the entire cutting and sanding done up front. The resin is dusty and messy and as long as I have the tools out and the vacuum handy, I cut out all the parts and sand them. I then place the parts not needed in a Ziploc bag and back in the box. That means only one good cleaning of the resin dust. The cockpit is very straightforward and the instruction has good pictures to help you locate parts. I installed both sidewalls and the back bulkhead and cockpit bottom and used this as a base to locate other parts. In hindsight, I should have left the floor out and this would have made mounting the seat a lot easier. As it is, all the parts fit well with a little tweaking and with the paint, wash and dry brushing, looked very nice. One thing to watch - there are no instructions to use the PE instrument panel and there is an injected option. I used the PE parts, as they were just too nice to pass up. I thought I would add it after the fuselage was closed - really bad idea. Spent and hour and much griping at myself and only got it to fit OK. Add it prior to closing the fuselage. Before closing the fuselage, the landing gear bay bulkhead needs to be built. Parts included are the bulkhead, the engine bearing braces and the rear of the engine. This takes patience and PCM recommends sanding to get a good fit as it is also the wing spar. I sanded mine and forced it into place a little (which came back to bite me later). I suggest not adding the rear of the engine to the braces here until you get the bulkhead in place. This allows you to adjust the length of the braces as they do support the engine. At this point, the fuselage is glues and set aside to dry. While drying, I built and painted the resin engine. It builds into a nice replica. Adding details such as wiring and plumbing would really make it stand out even more. I also built the landing gear. After the fuselage dried, I added the wings, installing the lower pieces and then gluing the tops in place. Fit was good with just a little putty. You’ll notice that the two wings are different lengths; that’s the way it was, as they used this difference to handle the engine torque rotation. A quick sanding and we’re ready for paint. There are 6 options on the decal sheet with a range from green/gray to all the beautiful Italian schemes we recognize. I picked a scheme from the 96th Squadriglia, 4th Stormo that had a three-color top scheme that was beautiful. Painting went smoothly followed by a quick glaze and then the really nice Cartograph decals. Then disaster struck! I guess I forced the bulkhead just a little too much a few step back but it finally popped the top seam open (I took a picture for posterities’ sake). Rats - I always get in trouble when I hurry. The seam was filled and sanded and the top repainted. Not as happy as I was with it but not bad. I got the canopy ready and added that last. I screwed this up (you would think two would be enough) a little but got it on and fit. I painted the cowling separately and added it last. I added all the details and landing gear and weathered the model. Just a little pastel and transparent smoke color. A quick flat coat and the model was done! This build was a lot of fun. Detailers can consider this a good palette to wire the engine, separate the flying surfaces, etc. OOBer’s like me can have a great replica in 1/32 scale of a great Italian fighter. I recommend this kit to modelers with a little experience in multimedia kits. Pacific Coast Models can be reached at www.pacmodels.com. |
|
|
|
|
|
|
) |
|
|
|
|
Information, images, and all other items placed electronically on this site are the intellectual property of IPMS/USA ®. |
|
)
)
)
)