|
Academy Kit Number 1341 1/25 Panther V Ausf G |
|
Reviewed By Bruce Drummond, #37265 |
|
|
|
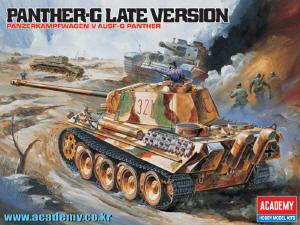
MSRP: $79.00 USD I think that every once in a while, as a modeler, we often dream as we build, “wouldn’t it be cool to be able get down in the dirt and run this Vehicle “? Well here’s your chance to have fun and fulfill that very daydream and at a relatively low cost. Academy Hobbies is offering to us just the way to do it in the form of a 1/25 scale vehicle of one of the world’s most famous tanks – the Panther V Ausf G, in remote control. While the box has pretty neat artwork, its size is not the usual 2 times the size of the kit enclosed inside (more for the money?). It offers the following: 247 plastic parts, of which, 18 are for the JagdPanther and therefore are not used. 18 poly caps for the suspension, 26 metal parts and 1 set of generic decals of numbers and crosses and no unit markings. This amounts to 309 total parts. After a quick scan of all enclosed, I then pulled the instruction sheet. It has 15 steps not including painting and follows the same basic sequences that we follow with smaller kits. Flash is all but non existent and all parts fit cleanly with no warpage or gaps, just cleaning the attachment nubs. If ever a kit could be ‘shook’ together in the box this is it. Refreshing! The chassis rides on actual torsion bar suspension and the tracks for each side, semi soft poly, are a solid 2 piece strip affair that are pinned with metal bars. They are well represented with detail and are quite flexible and respond well to paint. The motor is easy to place and wire. If you do not solder the wire connections, then you must make sure they are tightly twisted and secured to the armature contact pins. This is a must! Between this step and the hand controller, a separate wiring diagram sheet is enclosed to check wiring connections. Inside the controller are four ‘V’ shaped contact points that rest on pins for directional controls. These need not to be altered but are a little tricky to keep in place until the circuit board is screwed down to enclose the whole affair. The balance of the kit from this point deals with the upper hull and the turret, all of which go quickly together. Paint is the next step. The given scheme in the instructions is the 3 color ‘Ambush” type. Obviously, this is your option as a sand yellow base is the best choice for the young or novice modeler just to build and run for fun. I covered the yellow base with green spots as camouflage. A little Future floor wax and when dry, the chosen decals to finish. Overall, for a remote controlled model, I found this fun to build and run through the dirt in my back yard. It even left track marks while this feared giant of the Wehrmacht ran down and trapped the feared 4 footed ‘Flea Fighter’. Cool. There was no cruelty or injury to any animals in the building and writing of this article. As usual, an experienced modeler can render this kit to be in a highly detailed static/remote state. It is a very good base for additions. A young/novice modeler could have all the rewards that dad dreams of when building this kit. Left to their own devices I think they could accomplish the completion of this kit with little or no help and therefore rides high on my list for a weekend of building and fun for a father/son team or any individual. Enjoy this one! |
|
|
|
Information, images, and all other items placed electronically on this site are the intellectual property of IPMS/USA ®. |
)