|
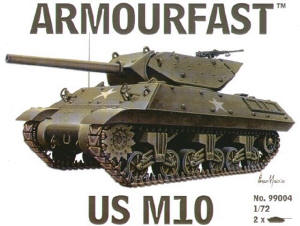
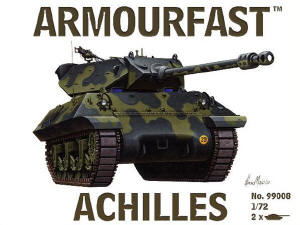
HaT Industries Armourfast Line Kit Numbers 99004, 99008 1/72 M10 Tank Destroyer 1/72 Achilles Tank Destroyer |
|
|
Reviewed By James Kelley and Christian Kelley, #42106 |
|
|
|
|
|
Available at several online retailers for around $7.50 (2
kits!) Targeting the Wargaming crowd, the newest releases from Hat Industries include several new kits in their Armourfast lineup. Aside from the M4 Sherman, Russian T-34, Panzer III and Jagdpanther, the M10 Tank Destroyer and it’s British Wolverine counterpart round out the series. There are also several infantry/MG crew sets as well. The focus of this review is the Allied Tank Destroyers. Packaged in pairs (2 each of either the M10 or the Achilles), these 12-piece kits are ideal for the entry-level modeler, or more specifically, the Junior set. Now, admittedly, as one who primarily models aircraft, I don’t know much about armor. But, I know a thing or two about Juniors, as I have a squad of little Kelleys eating me out of house and home, and more recently, pillaging my plastic stash. So, when I heard about these releases, I wanted to showcase them from a perspective that kids (and their parents) could appreciate. Which means I needed some help. Enter Christian Kelley, age 6, and entry-level scale modeler (Pic.1.). With a couple of awards under his belt already, he was gracious enough to take time out of his busy afternoon schedule to show me a thing or two about “tanks”. |
|
) |
) |
| The kits are presented on a single sprue of dark green plastic with a nice consistency. Not too soft, not too…. you get the idea. Each one, as mentioned above, has 12 primary parts. The Wolverine has 14 parts, as 2 Jerry cans are included. It’s essentially the same molding, with the late-style turret counterweights and 17-pounder weapon. The M10, which you see in this article, has the “mid-production” turret. The treads, road wheels, and idler rollers are a single piece, nicely detailed unit, and attached easily to the lower hull. The upper hull went easily on top of this, with a slight “lip” noted at the front. This is easily sanded off. The 2-piece turret sits in a pin-and-hole arrangement, so that it can sweep the Wargaming horizon 180°.There was a slight gap noted at the right rear corner of the turret. The counter weights do not have any locator identifiers, and must be self-aligned. They don’t quite reach to meet in the middle when aligned with the rear angle of the turret, and if joined in the rear middle, do not quite reach the lateral angles. Christian decided he liked the way it looks with the sides symmetrical. The turret was completed with the cannon barrel assembly, and the 2 very nicely-detailed MGs. Of note is the completely empty, featureless inner-turret/crew compartment. But, 2 kits for under eight bucks… All the more room for detailing!! | |
|
|
|
|
|
|
| Speaking of details, the kit on the whole is very well molded, crisp, and without flash. No cleanup, outside of sanding a few detachment burrs, was needed. There are no tow hooks, grab handles, or the like, but the rivet detail matches Squadron line drawings with near exactness. Now, on to the building: Christian was “on his own” for this one, as the past few models he built were done “hand over hand” with me. He’s always separated the parts from the sprues alone, but I’d guide his hand, with mine, when using the Tenax applicator and airbrush. The photos show the technique used for this build. First, all 12 parts! were assembled (Pics. 2-5.). Then, on to the pre-shading! For small-scale armor, spraying the whole model flat black will do (Pic.6), then the overall camo scheme (Olive Drab) was shot at a downward angle to highlight naturally shadowed areas (Pic.7). Then an application of Future is applied, followed by application of a few decals swiped from the parental stash (The review kits supplied had neither decals nor instruction sheets.). A coat of Flat Acryl, then a little dry-brushing, and voila! An ideal kit to introduce your child to scale modeling, or a fast addition to the Wargamers’ battalion (Pic 8). Total construction time, from beginning to end of pre-shading stage, was 39 minutes. The Olive drab, decals, and Future/dry brushing/flat coating were accomplished 2 and 3 nights later. Even if you’re an accomplished modeler looking for a quick-build change of pace, or a nice kit to practice some scratch-building with, there’s something for you here. | |
|
|
|
|
|
|
|
|
|
|
Information, images, and all other items placed electronically on this site are the intellectual property of IPMS/USA ®. |
|
)
)
)
)
)
)
)
)