|
Italeri
1/72 scale SdKfz 251/1 |
|
|
Reviewed By Chad Richmond, #10346 |
|
|
Click images to see full-size photo |
|
|
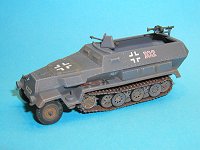
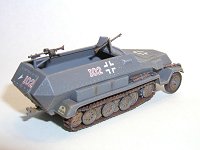
When John Noack sent me this kit, I was hoping for a new release and some new molds. But, the old ESCI kit is alive and well in a new Italeri box. There are 108 parts to this kit, contained on three sprues. Two of the sprues are an Afrika Korps yellow and the track link sprue is in a metallic gray color. It also still has the old ESCI kit number on the sprue. The instruction sheet is a ten page foldout which lists all of the paint colors in Model Master and Model Master Acryl numbers. The instruction sheet is in at least 20 different languages, depending upon where you look. Two full pages are devoted to painting and marking with four choices: Stalingrad 1942, Kursk, 1943, Tunisia, 1943 and Sicily, 1943. That gives you two in dark gray, one in Afrika Korps brown and one in Afrika Korps Dark Gray. I chose the Kursk markings. Two figures also come with the kit, but major sink marks make them pretty much unusable. Probably the biggest criticism I have of the kit is the joining of the parts to the sprue. The sprue is very large and so are the pour gates, which in many cases cause damage to the part when separating it from the sprue. Even when care is taken, this happened in a few cases. Surprisingly, there was almost no flash on any of the sprues. Rivet detail is extremely exaggerated, which can cause some problems on some of the joints. Fit was not all that great, but nothing insurmountable. I built the kit per the instruction sheet, which will help avoid some potential problems. The first step involves the total body assembly. The interior floor did not fit all that well, being just slightly too narrow. But, I kept using plastic glue on the side joint until it filled in. If you install the steering wheel as shown and as marked on the parts, it will sit too high for the upper body to fit. I lowered it so the steering wheel was even with the top of the dash, and that worked. I did have trouble with the fit of the upper hull. It fit well on one side, but I had a gap on the other. I never could figure out why. The front plate does not fit that great. It will fit at the bottom or fit at the top, but not both. I didnít try heating the piece and bending it to increase the angle of the join. That may have cured my problem. I did not attempt to fill any of my gap for fear of destroying rivet detail. Assembly of the running gear is next with both sides assembled as units on a side plate. The side plate did not fit at all, so I did some trimming and fitting to get it into place. Once that was done, it was time to install all of the wheels, idler and drive sprocket. The alignment is slightly off, but in this scale is hard to really see, once the whole assembly is done and installed on the chassis. The tracks are in individual and multiple pad runs, and fit very well. They are a little thick, and donít really look as good as I would like going around the drive sprocket and idler, but once again, we have to consider the scale. If you tried to put them on after the side plates were installed, youíd end up calling the model a few new names. After I had everything glued together, I found that the "sit" of the model was off. The front tires were both off the ground about .010. If I had done some dry fitting of the assemblies prior to gluing, Iím sure I would have avoided that problem. At that stage, there was little I could do. A base and some ground work will remedy that situation. The running gear only consists of two parts, plus the tires. The fenders and skirts have all of the tools and storage compartments as separate pieces, which all go together well. The tools are a little out of scale, but in 1/72nd scale, thatís not real easy to do, either. Fitting of the fender to the body takes a little coaxing, but any slight gaps that may result will be covered by the shape of the body sides or by the tracks. The rear doors can be displayed open or closed. I opted for closed. I painted the model with PollyScale Panzer Grey and used Future as a gloss coat. I only glossed the areas that were going to receive decals. The decals in the kit were in perfect register and went on extremely well. The adhesive on the decals works! It takes a lot of water to move the decals around if you donít get them right the first time. I did not use any setting solution and had no problems with silvering. The only criticism is that they may be a little thick, but once I got the model dull coated, I was happy. The decal placement and size is different on the box art and the instruction sheet. The decals are a little large, but the end result was acceptable. There are a few minor details missing from the kit such as rear view mirror and tow hooks, but those are minor deletions. Thanks to Italieri and Testors for the review kit and to John Noack for allowing me to review it. |
|
|
Information, images, and all
other items placed electronically on this site |
|

