|
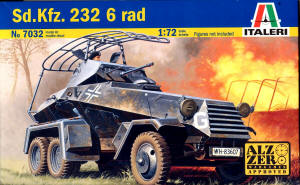
Italeri 1/72 Schwere Panzerspähwagen (Fu) SdKfz 232 (6 rad) |
|
Kit Number 7032 |
|
Reviewed By Jim Pearsall, #2209 |
|
|
|
MSRP: $15.00 USD Thanks to Italeri for providing this nice kit to review. The Vehicle: The Sd.Kfz. 232 (6 rad) was one of the early Wehrmacht armored cars. It is immediately identifiable as a 2 ˝ ton truck with armor added and a turret. The basic unit was built on upgraded chassis from either Daimler-Benz or Bűssig. The 232 is a sub-model of the Sd.Kfz. 231 6-wheel armored car. The 232 was issued to Aufklarungs (recon) detachments. The 232 had a large radio antenna on top, so it’s immediately recognizable. The concept of having radio communications which were both mobile and close to the front proved to be a huge tactical and strategic advantage in mobile warfare. They were used during the Polish Campaign of 1939 and in France in 1940, but as soon as the more mobile, better armed and better protected 8-wheel armored cars became available, the 232 was taken out of service and relegated to training units. |
|
|
|
The Model: One box-sized sprue. No clear parts, no resin, no photo etch. But also no flash, no mold flaws, no warped parts, and only a minimal mold part line on fine parts. There was a little confusion on my part early on, as most of the parts are marked A1, A2, etc. But there were also parts for “B”. And there’s only one sprue! Closer examination reveals that the tree is divided into an “A” section, which has the basic vehicle, and a “B” section, which has the antenna and mounts. I suspect they’re going to release the Sd.Kfz. 231 (6 rad) later. Or you can just leave off the “B” parts and build the 231 from this kit. |
|
|
|
Decals are for 4 different vehicles, one a training unit pre-war, one on
the Polish Campaign, one for 2 Pz Division in France, 1940, and one for 3
Pz Div, also France 1940. The Painting instructions show the pre-war, the
Polish Campaign and 3 Pz Div, the box top shows 2 Pz Div. Construction: Everything fit very well on this kit. The hull top and bottom required no filling; the turret went together with no fuss. Italeri’s engineers have gotten to the point that the entry points for the plastic (where the part attaches to the sprue) are fairly small, and with only a little care, you don’t damage the part when you remove it. Additionally, the attachment point is usually where it’s not glaringly obvious where the part came off the sprue. Good on you, Italeri. I did manage to cut a little bit too much off of one of the front fenders, and when I glued it on, there was a gap between the body and the fender. More on this later. I followed the instructions up to a point. I left off the muffler (painted rust) the guns (metallic), the antenna, and the wheels (tires painted muddy brown) until I had the main color painted. That’s because it’s all Panzer Grey. Set the airbrush on wide and let fly. I painted the spare tire cover Feldgrau, because I thought it looked right. |
|
|
| I tried something a little creative when removing the mold lines from the tires. Since tires normally wear along the tread, and the mold lines ran the circumference of the tires, I mounted each one on a toothpick, chucked the toothpick in my cordless drill, and sanded the mold marks off in a jiffy. Don’t try this with a Dremel, as it’s WAY too fast. (Do you hear the voice of experience here?) |
|
(put mouse over movie to watch) |
| The one part which separates this kit from the usual “pour in some glue and shake the box” is that the small lights on the sides, headlights and tail lights had no dimples or locating holes. I got out a fine drill and made my own locating holes. This was only challenging for the head lights and tail lights, as there’s not a whole lot of info on the instruction sheet on where they go. The lights themselves look good, and the mounting parts are finely done, to the point of being delicate in this scale. It does take a pretty fine drill to keep from overdoing the size of the holes. |
|
|
|
Note the nice locating slots for the “trafficator” (turn signal here in
the Colonies). Nada for the lights, however. Nevertheless, they went on fine. I put a tiny drop of chrome silver inside the side lights and the slits in the blackout headlights, and put Micro Krystal Kleer in as lenses. The same for the tail lights, only red instead of silver. Earlier I mentioned a fit problem with one of the front fenders. I looked at it, and decided that I could fix it with an application of Mr. Surfacer 500. Instead of applying it and sanding it, however, I decided to try a weathering technique. I mixed burnt umber acrylic paint into some Mr. Surfacer, and slathered it in under the fenders. Instant mud! I had to apply more paint to make it convincing, but it sure was easier than trying to do the fill, file & sand routine. I added some to all the tires, and to the body behind the finders. I tried not to go overboard, as even a well used vehicle is going to get cleaned once in a while. I applied a coat of Future, then the decals. I decided on 2nd Panzer Division in France, 1940. The decals came off the backing cleanly, went where I wanted, and stayed put. It’s nice to work on flat surfaces. I sprayed on Testors acrylic flat for a dull coat. Looked convincing. I saved the antenna for last. I do not have a real good record of handling delicate parts when doing decals, and thought I’d better save this. Everything fit nicely here. The support for the antenna on top of the turret fits into a small hole in the bottom of the antenna assembly, and there are two other supports at the rear of the vehicle. If you do it very delicately, the turret can turn. When I tried to turn the turret, I slightly bent the supports at the back, and the antenna came off the turret support. So I glued it on. I’m sure you can achieve better results. |
|
|
|
Overall Assessment: This is a very nice kit both from the point of view of “interesting” but also from the builder’s standpoint. It has a low degree of difficulty, although I would have liked to see locators for the headlights, tail lights and those lights on the body below the turret. Otherwise, the assembly, painting, and decals were really easy. No surprises in the assembly, no bad fit anywhere, except where I got overenthusiastic with the trimming knife on a fender. The subject matter is certainly interesting. You hear a lot about the Panzers, but less about support and reconnaissance vehicles. And this one is of interest to me, as one of my primary duties (when it didn’t interfere with my “other duties as assigned”) was Communications Maintenance. I also have my Amateur Radio license. Love that antenna array! Thanks to John Noack for supplying an interesting project. |
|
Information, images, and all other items placed electronically on this site are the intellectual property of IPMS/USA ®. |
)
)
)
)
)