|
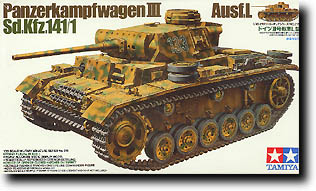
Tamiya Kit Number 35215 1/35 Panzer III Ausf. L |
|
|
Reviewed By Jack Bruno, #25313 |
|
|
|
|
|
MSRP: $37.00 USD
About a month or so ago I posted a picture of my nearly completed Tamiya 1/35 Panzer III Ausf. L on the IPMS Forum. Well, after a bit of determined work I finally got it done just in time for the IPMS/Butch O'Hare Show coming up this November. Tamiya quality is just about GOD when it comes to armor in plastic. The Panzer III Ausf. L is no exception. The quality cannot be beat and the variety of schemes and versions will keep anyone from running out of ideas for a good time span. The Panzer III fought on all fronts and besides the Panzer IV, was the workhorse of the Mailed Fist. My model represents a tank on the Russian Front in July of 1943, during the Battle of Kursk. The instructions of the kit were followed from start to finish. There were no problems whatsoever that I encountered. I must explain that basically all armor modelers build their tanks in three sub assemblies: turret/hull/wheels or running gear. It keeps the model organized for painting and detailing and prevents any accidental breaks. I deviated or detailed a few items of note: I used Verlinden screening to enhance part #B19 and parts #B18 and B17. These are vents that were favorite targets by troops with grenades or Molotov Cocktails. Tamiya does sell an additional PE fret with these parts included, but I hate spending money on something very easy to make. I must say that it does make the rear deck stand out with dry brushing too. On the front hull some patience must be taken when assembling the frontal spaced armor. It is a little tricky and my advise would be to do one side per session instead of all at once. With care, you shall prevail. The tools were sanded down and any molding lines were removed as with all of the kit parts. I mounted them on the tank at this time. I scratch built an extra stowage rack that was very common practice in the field. Brass strip and plastic was bent and cut and the whole thing done in 20 minutes. I used putty to simulate welding in the construction and mounting. The turret was next and kept separate from the Hull and Running gear at this time. I added a small bolt beneath Part #A32 on both sides of the turret. Although Tamiya did not include or show them, they were there on the real machine. With all three of those sub assemblies done it was time for darkness. I simply love the transition period between the pre-1943 dark gray and the post 1943 dark yellow for all vehicles in the German Armed Forces. Units in the field complied and over sprayed their dark gray mounts with dark yellow and achieved a variety of camo schemes and patterns. Factory fresh vehicles emerged with a dark yellow base and were quickly over sprayed with dark green or red brown patterns or blotches or lines or in some cases, both colors. But, back to the kit. I sprayed everything black at this time... everything! Armor modelers have done this for years and lately I've seen A/C builders use the technique for panel lines and call it pre-shading... whatever you call it, it works. After a two day drying period I gave each sub assembly a shot of dark gray and then light gray. This gives depth and shadows to the kit. After the gray was to my liking I shot wavy blotches of dark yellow for the camo pattern. It was after this that I detailed and painted the stowage and tools. I used a Verlinden resin wicker basket and fuel drum for extra stowage in the rack. I gave all the assembles a coat of Future before the next step. After a 24 hour period I gave everything two washes. First, one wash of turpentine mixed with a small bit of burnt umber, waited to dry for 24 hours, and then a black and turpentine wash. When the turpentine evaporates, it leaves the oily film behind and it is very easy to blend with a soft brush. After careful blending and dry brushing, I used PollyScale flat to give it a dead flat finish and seal up everything thus far. Lacking the proper flag, I opted for a Hitler Youth Flag I had on another Verlinden flag sheet. It was used for air recognition purposes and it worked for me! The next steps were to mount the wheels to the hull and paint the track. Using the kit tracks I washed them first in soapy water and let them dry. The next day I shot them first with flat black and in the same sitting, dark gray. Another shot of Future made way for a rusty wash followed by some dry brushing. When dry I just popped them on. It was all done except for one more thing... I build tanks, therefore I need mud. Celluclay mixed with a small amount of water and white glue did the trick. A little red brown paint, light brown highlights and some dry brushing followed by a couple of washes and... I got mud!!!! I thoroughly enjoyed this model and I'm excited that I've got two more stashed in the hooch. Verlinden also came out with an interior for this kit and that will be in the next one. I do have an aftermarket resin conversion to backdate the Ausf. L to an early Ausf. J, that 24th Panzer Stalingrad vehicle will be a reality soon. The other has Afrika Korps written all over it! I give this kit the highest recommendation and I'm sure you'll like it too. If you have any question regarding the kit or my techniques, drop by the IPMS Forum and give me a shout. Remember, By Modelers, For Modelers. Enjoy!!! |
|
) |
) |
|
|
) |
|
Information, images, and all other items placed electronically on this site are the intellectual property of IPMS/USA ®. |
|
)