|
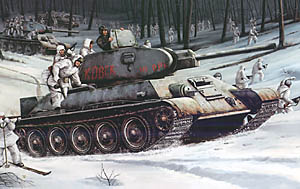
Trumpeter 1/16 T-34/76 |
|
|
Kit Number 0905 |
|
|
Reviewed By Mike Budzeika, #42771 |
|
|
|
|
|
I hate hype, and this kit has a lot of it. I have to say that after the
build most of the hype is valid. What I will try to achieve with this article is a review of the kit, and my build of it. So
let’s get down to business. I chose the T-34/76 model 1942; I like the one large hatch on the turret instead of the “Mickey Mouse” hatch configuration of the 1943 model. The first thing you’ll notice about the kit is the box, it is quite large, and has boxes inside the box, which hold the road wheels, tires (yes the tires are separate from the road wheels), headlight lens, and the track links. There are fourteen major parts trees, two photo-etch frets, springs for the suspension, and brass wire for the tow cable. If you’re not used to heavy lifting, you may hurt yourself, as there are over 700 parts in the kit. The instructions are twenty pages long with forty steps in a logical progression from the suspension, lower hull, engine, upper hull, road wheels, then turret…whew. The diagrams of each step are well done, they call out part numbers and paint colors. OK, on to assembly. I pretty much followed the instructions during the assembly of the model to completion. I started with the suspension springs, which consist of eight long and two short spring assemblies. The next few assembly steps are for the interior walls, which the eight long spring assemblies will be attached to, as well as, shells, photo etch ammo containers, and gears. The interior wall assemblies are then attached to the lower hull along with the two short springs in the front. The arms for the road wheels are then attached to the lower hull with poly caps. I did the assembly of the components for the lower hull-fighting compartment next. I did have one problem crop up later when attaching the wheels. The parts (F5) that hold the arms for the road wheels need to be firmly glued to the lower hull, as I found out after cementing the upper and lower hulls together. I had one come loose, and could not put it back in the correct location, so I had to glue on one of the road wheels. The engine is very well done, consisting of over forty parts. The gearbox is also a mini-model, which has over thirty parts, and looks great. Unless the model is displayed with the upper hull removed, a lot of the detail will be lost, as there are only a couple of engine deck hatches that can be opened. The upper hull has most of the detail on the outside. The one area I thought was well done, was the drivers hatch which consists of fourteen parts. The upper hull has a separate turret ring section, as the versions had different configurations. The fit of all parts to the upper hull was good, including the photo-etch screen to the engine deck. Combining the upper and lower hulls did leave a gap where they meet in the back. I filled the gap with sheet styrene, which did the trick. I also decided not to include the external fuel tanks, as I wanted a different look. The wheel assembly was nice, as they could be painted before the tires were installed. The idler wheels have a neat feature of being able to adjust the for the track tension before gluing. The turret comes in two halves and a top. The turret is where I had the most issues, nothing bad, just some extra work. Fitting the two halves together leaves a seam that I filled. I ran some liquid cement on top to duplicate the cast texture of the turret. I did replace the gun, using a Fine Molds barrel that is rifled, and fits perfect. Two areas of the turret had injector pin marks, the gun cradle (I did not see until after assembly), which I covered with sheet styrene, and the turret hatch (it had thirteen pin marks!), which I filled. One of the pin marks in the turret hatch was a pain to fill, as it was within a small signal flag hatch, and with too much sanding could remove detail. The worst part about this kit to me is the tracks. The tracks are more like toy tracks, than for static display. They do go together very well as they snap fit, which is great for rolling it around the floor, but not accurate. The type of track pattern may be wrong also, but in the field who knows. I panted the inside of the model Off-White, with an oil wash of Lamp Black, and some paint chipping with Vallejo Black-Brown #822. The outside of the model was painted with a mixture of Humbrol paints 75% #117 and 25% #116, gave it a wash of oils (Lamp Black, Burnt Umber), used pigments for dust and dirt. I’m not too sure about their choice of decals (only one option included) and paint for the model, as it is depicted in winter camouflage at the battle of Kursk. That battle was fought in early July of 1943, which is the middle of summer in Russia. No biggie, I just painted on my own numbers. Overall, the look is right on (I’m no expert), but a lot of the interior details cannot be seen unless you split the hull, something I personally do not like to do. There are no major fit problems, and if a company makes aftermarket tracks, and with the addition of an aftermarket barrel, it can make a very stunning model. I will be building one of the T-34/85’s as soon as I can rent a U-Haul. |
|
) |
) |
) |
) |
) |
) |
) |
) |
) |
) |
|
Information, images, and all other items placed electronically on this site are the intellectual property of IPMS/USA ®. |
|