|
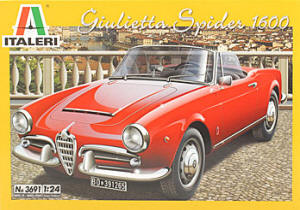
Italeri 1/24 Giulietta Spider 1600 |
|
|
Kit Number 3691 |
|
|
Reviewed By Joe Staudt, #39453 |
|
|
|
|
|
MSRP: $27.50 USD From 1955 through 1965, Alfa Romeo produced a stylish little coupe and roadster based on the mechanicals of its bread-and-butter Berlina sedan. The cars were quite popular and handled quite well for the time, and helped secure Alfa Romeo’s future in the automobile business. These cars were the Giulietta Sprint and Giulietta Spider. Italeri has recently released a kit of what it calls the “Giulietta Spider 1600”. But according to my reference (the April 2003 issue of Collectible Automobile magazine), when Alfa introduced the 1.6-liter (1600cc) engine in 1962, the Giulietta became the Giulia. This kit, with its raised hood bulge and larger taillights, represents a Giulia, not a Giulietta. Perhaps I shouldn’t argue with an Italian model manufacturer over the name of an Italian sports car, but Collectible Automobile is generally pretty reliable. Whatever you call it, this is an interesting kit of a beautiful vehicle. I am unfamiliar with the history of Italeri’s product line, but my guess is that this kit is a retooling of a previous release. Although it is a curbside, the hood and trunk lid are separate parts, and the engine end of the exhaust system looks like it was designed to mate up to the headers of an engine. There is no “up top” provided, but the side windows are molded in the closed position (on a convertible!). There are some spare engine parts on the chrome parts tree. And finally, there is a trim line in the center of the cowl that would line up with a similar line down the center of the hood of a Giulietta – a line that is missing on the bulged hood of the Giulia (for accuracy, you will want to remove this before painting the body). All of these seem to indicate that this kit may previously have been released as a full-detail Giulietta with an optional roof. None of these things detract in any way from look of the finished product. The kit is molded in black (interior and undercarriage) and red (body) plastic, with the usual chrome and clear plastic parts as well. The no-name tires have a realistic tread pattern and are molded in either rubber or a soft vinyl with a matte surface that looks like real rubber. A pair of metal springs for the rear suspension is also included, as is a small but comprehensive sheet of decals. All the engraving is reasonably sharp, flash is minimal, and the only serious mold lines I noticed were on the bumpers. All the parts fit together snugly so don’t lay the paint on too thickly. The body dimensions appear to be a good representation of the subject. In addition to the hood and trunk, the doors are also separate pieces. I liked the way the inner and outer door panels are designed to sandwich the door glass in between them; it makes for a nearly foolproof way of keeping the side glass properly aligned with the windshield. One word of caution for those who choose to paint the body of this car: the rear roll pan and fenders below the bumper line are molded into the chassis, so you will need to mask and paint that part of the chassis to match the body. All of the major chrome trim pieces are molded as individual parts, and each fits neatly in its assigned location. The interior is pretty simple, as is that of the real car. Decals are provided for the gauge faces and the emblem on the center of the steering wheel, and for the surfaces of the clutch and brake pedals as well. There is no seatback detail, but when the seats are left black it is hard to tell on the finished product. Also missing is anything to represent the folded convertible top, which is quite easy to see in the space behind the front seats. The chassis is also quite simple. A piece of plastic with molded oil pan detail is provided to fill the space where the engine would be. A very simple rear suspension with real metal springs is provided, but there is absolutely no front suspension detail: the front wheels mount to a straight plastic axle with attached brake “disks”. A separate, one-piece exhaust assembly is also provided. The chassis also provides the platform on which the interior is assembled. The decals are some of the nicest I’ve worked with, separating from the backing paper quickly and neatly and snuggling down well. In addition to the interior decals mentioned earlier, there are decals for the grill and trunk emblems, the hubcap emblems, the front fender emblems, and two sets of Italian-style front and rear license plates. There are several other decals as well, but no indication as to what they are or where they go (more evidence for this being a retooling of a previous kit). The instructions provide painting recommendations, and each part is numbered but not named. The exploded-view drawings are clear, but you are on your own for figuring out the best order to assemble things within each of the seven assembly steps. Most of the time, this isn’t a problem, but there are a couple of places where you want to carefully consider the assembly order. For my own build-up of this kit, I decided to stick with the classic red-and-black color scheme. But to be accurate, I had to paint the dashboard face, the transmission hump, and the interior door panels red to match the body, which meant I also had to paint the body (which was molded in red) to be sure the colors would match. I installed the hood and trunk lid before painting, both to ensure an even finish and to give the body a little extra strength so my painting “tongs” wouldn’t warp it. After the body was painted, I applied the decals for the front fender emblems, and then sealed everything with a coat of Future floor wax. Once that was all dry, I foiled the hood and trunk hinges and the lower body trim, painted the front side marker lights, and windshield washer nozzles, and set it aside. On the interior, once the inner door panels were painted red, I painted the upholstered inserts black and foiled the window cranks, door handles, and door pulls. The dashboard also got some foil and some detail painting, in addition to the gauge decals. The steering wheel and column were painted gloss black with silver spokes, and the center hub decal was applied; the separate turn signal stalk is a nice touch. I painted the floorboards, seats, and rear panel flat black, and then gave the seat and rear panel a coat of semi-gloss. The back of the dash-mounted rear view mirror also got a coat of semi-gloss black, as in my reference photos. Everything else was painted according to the kit instructions. Assembly went quite smoothly. I would, however, recommend not installing the rear view mirror until the body is attached to the chassis. I couldn’t stand the thought of building a convertible with the top down and the side windows up, so I got out my trusty X-acto knife with a #11 blade and removed the appropriate parts of the side windows. Because of the way the windows are sandwiched in the doors, I had to leave the bottom edge of the “glass” in place. Since this came out to be level with the top edges of the doors, it was not a problem. I painted the upper edge of the remaining side glass flat black and foiled the trailing edge of the vent windows, thereby covering all the cut edges. I was quite pleased with the end result. At this point I also foiled the chrome trim on the windshield. The underside of the chassis received a coat of flat black, with gloss black accents. The suspension bits and exhaust system were painted Gunmetal and silver as per the kit instructions. Note that the tail end of the exhaust pipe should probably be painted silver, not gunmetal as indicated. I also reamed out the end of the tailpipe for some extra realism. Assembly went without a hitch, once I figured out the relationship between the rear axle and the exhaust system (hint: install the axle first, then the exhaust). The wheel and tire assemblies consist of the tires, the wheels, a retainer, and the hubcaps. The wheels are chromed, but I painted them silver to match my references. After applying the decals to the hubcaps, I brushed a coat of Future over them to protect them from the rough handling I knew they would get during the assembly process. Getting the wheels onto the axles was a nerve-wracking process: the fit was very tight and required a lot of pressure to get the wheels on, but the axles (especially the front axle) are somewhat flimsy, so I was deathly afraid of snapping them off in the process. Things turned out okay for me, but I would recommend reaming out the holes in the retainers and/or sanding down the ends of the axles to make them fit more easily. With the chassis and interior assembled, I decided to attach the dashboard to the body and install the body on the chassis (step 7) before attaching the windshield and other body trim (step 4). I find if I do it the other way around, I generally knock a few of the trim pieces off while trying to get the body down over the chassis. Once the body and chassis were securely mated, I mounted the rear-view mirror on the dashboard and then installed the windshield. The doors went on next, followed by the various bumpers and trim pieces. The last thing to go on was the outside rear-view mirror, which is a two-piece assembly and quite fragile. The headlights and parking lights have no chrome behind them and can look unrealistically dark as a result; to fix this, I foiled the backs of the headlights and applied a bit of silver paint to the backs of the parking lights. Aside from the mirror, the trickiest piece of trim for me was the chrome edge on the hood scoop. This is a very small, thin piece of plastic with no locating marks. On the real car, it appears to go on top of the leading edge of the hood scoop, but on the kit it attaches to the front of the scoop. Another difficult part of this kit were the taillights. They are supplied as clear pieces of plastic with no real detail. On the real car, they are edged in chrome, with a wide band of chrome going across the raised center portion. The lower portion is the backup lamp, and the upper portion is the taillight, which is either all red or part red and part yellow, depending on the model year. There is also a rectangular red reflector in the middle of the wide band of chrome. I did my best; using foil, clear read and amber, and clear white to get the proper look. Given a second chance, I would probably use silver paint instead of foil simply because the parts are so tiny. In the end, the kit came together quite nicely. Even though it is a curbside, and the chassis detail is lacking, there is enough body and interior detail to make a nice display model. Someone who is into scratch building could even use this kit as a good starting point, add the missing components, and come up with a really detailed model. Everything fits together the way it should, and there are no really nasty surprises along the way. All in all, I would recommend this kit to anyone but the beginning modeler. Many thanks to Italeri and IPMS for giving me the opportunity to build it. |
|
|
Front View. |
) Rear View. |
) Left rear-quarter view. |
Left front-quarter view. |
Closer view of the dash and interior detail. |
Chassis view. Note the lack of front suspension detail. |
|
Information, images, and all other items placed electronically on this site are the intellectual property of IPMS/USA ®. |
|
)
)
)
)