|
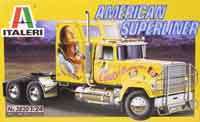
Italeri Kit Number 3820 1/24 American Superliner |
|
|
Reviewed By Fred A. Amos, #6672 |
|
|
|
|
|
This kit is a model of an over the road tractor with a sleeper cab. I can’t identify what truck it is supposed to represent but it resembles a White Freightliner or a Peterbilt. Since I don’t normally build trucks its hard to tell. The kit contains nine sprue, (two black, two yellow, two gray, two chrome, one clear) and ten rubber tires. Construction begins with the truck frame all in black plastic, and therein lays my biggest complaint with this kit. The locating tabs, indents, holes, and/or scribe marks are impossible to see when putting black plastic to black plastic. Some of the parts had to be painted a flat white to be able to see where they would be fitted. The suspension is assembled next, same problem with black plastic. Next comes the diesel motor and all of its accessories. Then comes the assembly of all of the accessories to the frame, diesel motor, radiator, fuel tanks mud flaps, fifth wheel, etc. I strongly suggest that the builder not glue part number 111 to the frame at this time. If it is not in the precise place it belongs, the cab will not fit into place. Believe me. Next is the interior of the driver and sleeper cabs. This area is molded in gray plastic and will require painting before assembly. The items of black plastic (steering column, steering wheel, gear shift, seat support brackets) I suggest not painting. No one will notice. Construction in this area goes well, with no surprises. Next is assembly of the cab and sleeper. This is in yellow plastic but again, pre painting is necessary inside and out because there are areas of plastic that will be visible with the interior assembled into the cab and sleeper. The front fenders, grill and hood are designed to flip open so that the diesel motor and accessories can be seen, so I painted the inside of this part gloss black. GO FIGURE, HUH! Now comes the tricky part, putting the cab on to the frame. Remember part No. 111? Glue it into the tab in the bottom of the cab, then part No.150, (already part of the cab) will rest in the two uprights of the frame and part 111 can be glued to the frame. Again, you have the problem of black on black plastic. The sleeper cab is then glued into place. Be sure to position the tab of part No.215 into the slot under the sleeper and then glue it to the frame. This way you can be sure to get everything in its proper place. After all of this you can assemble the rest of the chrome parts, (horns, lights, mirrors, exhaust shrouds in place. This is very touchy because you have to scrape away the chrome plating off of parts that being glued with a solvent. Some of these parts are so small they would be broken or ruined by handling them. I chose to use Super Glue and accelerator on these pieces. The larger pieces such as the big saddle tanks and the exhaust stack shrouds left such big obvious seams that I wound up painting them with Floquil Bright Silver. The decals are beautiful and very colorful. They are high quality and everything is in perfect registry. They react well to both Micro-Scale and Champ decal systems. Decaling was probably the easiest and most satisfying part of this whole experience. Building this model was a pleasant change from building things with weapons, however I don’t believe I care to do it again. The kit was provided to the Reviewer Corps by Testors and should be available in your favorite hobby shop by the time you read this. |
|
) |
) |
) |
) |
|
Information, images, and all other items placed electronically on this site are the intellectual property of IPMS/USA ®. |
|