| Gator Masks |
| 1/72 Saab AJ-37 Viggen |
|
kit number |
|
Reviewed By Jim Pearsall, #2209 |
 |
|
MSRP: $12.00 USD
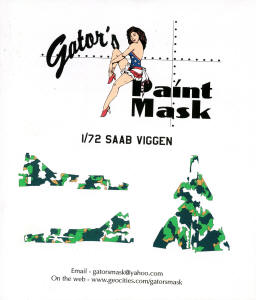
I reviewed Gator’s mask for the 1/72 Bf-109E (trop) a while back, and it got me to thinking. While involved in this dangerous pastime, I had an idea. This guy can produce a mask which will allow me to do the Saab AJ-37 Viggen 4-color camouflage! This color scheme is something I’ve wanted to do since I first saw photos of the aircraft 30 years ago. Unfortunately I was daunted by the idea of having to mask all of those little spots of color on a 1/72 aircraft. The argument boils down to whether I’d go insane or blind first. I e-mailed Ken and asked if he could do a mask of this scheme. He replied that he could, IF I could get some reliable color details to do a color separation. I provided him with scans of the color scheme from the Heller Viggen kit. For $21 (including S&H) he provided me with an envelope with two sets of the masks. One to use, another in case I screw the first one up. The Aircraft: Saab’s Viggen is an interesting bird. It originated the delta wing / canard setup now seen on the Eurofighter Typhoon, Kfirs, and late Mirage IIIs. The design comes from the necessity for a mach 2+ aircraft which can operate from improvised runways (roads). This leads to a STOL aircraft which has a low angle of attack to reduce pavement damage. The engine is a license built JT-8D turbofan, the same one used on DC-9s and 727s, but with an afterburner and thrust reverser. Sweden built over 300 Viggens, but failed to find any overseas customers, mostly because they refuse to sell to non-democratic regimes, and would cut off spare parts to anyone using their aircraft in an aggression. Oh, another trivia thing: The Swedish AF nickname for the aircraft is “Vigg”, which is a species of duck found in Sweden. And the French word for duck is “canard”. Coincidence, I don’t think so. The kit: While this is not a construction kit, it does come with instructions, but they’re pretty basic. The mask consists of 6 “Peel & Stick” vinyl sheets, with holes for the colors cut into the sheets. There is a sheet for Dark Green, top of the aircraft, and another for Dark Green, sides. Then a sheet for Brown, top and another for sides. The final sheets are Medium Green, top and sides. The holes for the mask are cut, but the modeler needs to remove the filler (weeding) to use the mask. The application: The idea is to paint the entire top of the aircraft black (color 1). |
|
|
| Then apply the mask for the dark green and paint all the places where this color is used. It was a little difficult at first to figure out where the different holes went in relation to the model, but the straight lines at leading and trailing edges made it possible to get decent alignment. |
|
|
|
Another trick I used was to swab the undercoat with a mixture of
dishwashing liquid and water, then let it dry. The adhesive on the
vinyl is very good, but can be too aggressive. This keeps the
adhesive from pulling the paint off the masked areas. It’s not
100%, but it sure cut down on the amount of retouch required. Here’s the dark green finished. So far, this is a walk in the park! |
|
|
|
Next comes the brown. (color 3) I began to hit problems here. The
brown didn’t line up exactly with the dark green on the fuselage top
and sides. So I cut the large sheet of mask up into smaller parts,
and applied each spot individually. This allowed much finer
alignment of the masks. And it worked pretty well. The masks stuck
nicely and prevented any underspray, giving a nice sharp delineation
between colors. I had applied the soap & water to the green, so the
masks didn’t lift this color either. I also discovered that it was far easier to see where individual masks went on the aircraft if I had a large, legible placement sheet. I scanned the instruction sheet at high dpi and printed it to fill a standard sheet of paper. This allowed me to see where colors went without having to use a magnifier. |
|
|
|
I then started with the lighter green. (color 4) Here’s where the
statement “some trimming may be required” in the instructions began
to mean something to me. There were small gaps between the colors
that were not managed by the mask. The wings (shown here) had some
problems, but the fuselage required fairly extensive fixes. These are caused by the limitations of the drawings I sent, which were scans of the original Heller instructions. These were 3-views, (left, right, top) and as such don’t show the curved sections of the fuselage very well. And the masks cant make up for the lack of information about the curved surface you get from a 2-D drawing. Nevertheless, I completed the light green, and then did some touching up. The blown-up scan of the color scheme was invaluable at this time. I was able to complete the model, and after touch-up, it was fine. |
|
|
|
I saved the masks by using the backing sheet from some labels. I also used the original backing sheet, throwing away the parts of the material which weren’t used. |
|
|
|
Conclusion: The finished product is a model I’m very satisfied with. It isn’t as easy as I thought it would be when I started, but this happens all the time. The thing is, I was able to do a scheme which I wanted to do for 30 years, but I was either too inept or too lazy. |
|
|
|
Also, this was an adventure in painting. It took me a complete
evening to do each color. Sometimes two, if the mask required
covering a recently painted area. Let it dry, apply the soap &
water mixture, leave it alone until I get back to the project. Then
another evening to touch up each color. Fortunately, this project
took place over the Christmas/New Year time, so I had plenty of
other things to keep me from starting the next color too soon. I bought 2 copies of this mask. I still have the second in its’ original envelope. I may very well buy another Heller Viggen and do this one again. Thanks to Ken Loup (also an IPMS member) at Gator Graphics for the opportunity to get a model done I thought I’d never be capable of. See the catalog at www.geocities.com/gatorsmask |
|
Information, images, and all other items placed electronically on this site |
)
)
)
)
)
)
)