|
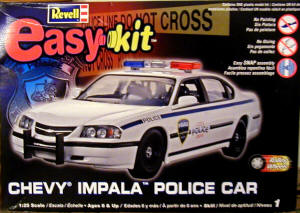
Revell 1/25 Easy Kit™ '05 Chevy® Impala™ Police Car |
|
|
Kit Number 85-1928 |
|
|
Reviewed By Phil Peterson, #8739 (Ghost writing for Becky) |
|
|
|
|
|
MSRP: $14.95 USD My 8 year old daughter, Becky and I opened our latest adventure. This would be her second car model and fourth kit overall (more than I have finished in the last year, just ask John). Having one of the Star Wars Easy Kits and having seen several of the aircraft kits I was excited to see this kit with the body painted, markings on and ready to go. Hmm, this is an Easy Kit, isn’t it. The kit comes in several colors, like most car kits, but there is no finish on the model. The body is bare white plastic and stickers (yes stickers) are supplied giving two different finishing options, a Huntley, Illinois Police Cruiser or a generic City Police Car. The body did have the headlights, grill and taillights preinstalled (which will require masking if you want to paint it). The lightbar was also preassembled and really adds to the finished product. The construction is all snap-together except for 2 screws to secure the chassis. Becky had a few problems trying to snap some of the parts together, namely the seats and the interior; otherwise the build went pretty quick. The interior has a couple of tricky parts but if you follow the instructions (you all do, right) it goes together without too much fuss. The only place that we had any real issues with was putting the wheels on the metal axles. The fit was so loose that the wheels literally fell off the first time we set it down. I finally resorted to a little craft glue to hold them together. Becky picked the City Police version and her big brother tried to help her with the wheels and stickers. After a few choice words (him, not her) they gave up and both figured it was done. I went back in to see what had caused all the commotion. It appears the instructions weren’t quit clear on where to place the stickers and one of the stripes had been put in the wrong place with the other markings placed over it. While I am not a big fan of stickers I was able to carefully peel off the offending markings and get them back on in the correct positions (try doing that after a decal dries). I then added the rest of the markings to the other side and we were done. One thing not pointed out in the instructions is that the front license plate needs to be added before the push bar. I simply pulled off the bar, put the sticker on in the correct spot and pushed the bar back into place. This ends up as a nicely detailed curbside car. Whether you are helping a youngster through their first build or are gluing and detail painting the kit it is a fun project and we recommend it. Thanks to Revell for supplying the kit. |
|
) |
|
|
|
) |
|
Information, images, and all other items placed electronically on this site are the intellectual property of IPMS/USA ®. |
|
)