|
Testors
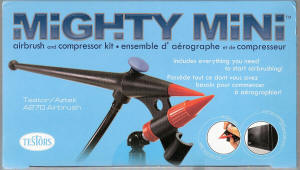
Aztek A270 Airbrush Set
"Mighty
Mini"
Stock Number 9169 |
|
Reviewed By Mike & Andrew Howard, #30741 |
 |
|
MSRP: $79.99 USD When offered
a chance to review an all-in-one beginners airbrush set, I thought
it would be a great opportunity for my 7 year old budding model
builder, Andrew, to give a test “drive” as he’d been asking me about
using my “paint sprayer” on his latest project, as 1/32 Revell
Tornado. Unfortunately the test had to wait due to a broken part
discovered right after arrival. The air actuator button, on the top
of the airbrush, was broken off and I could find no easy work around
as the plunger rod was a very small diameter piece of non-glueable
(is that a real word) plastic. |
|
 |
|
Mail was sent back through IPMS and a contact at Testors was
forwarded to me. All of this took about 6 weeks between making the
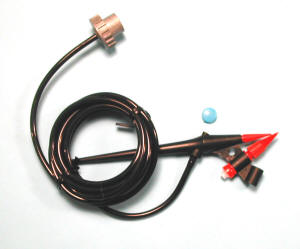
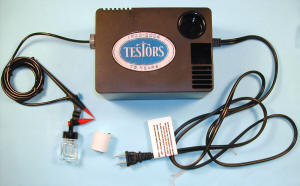
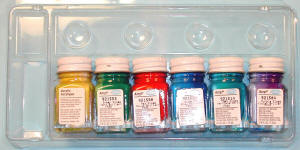
calls and getting the replacement parts. The set contains all of
the basic needs to start airbrushing, with no need to purchase
expensive and often hard to use propellant cans. A small diaphragm
type air compressor, complete with an on/off switch, an external
mix, single action airbrush, paint bottle, paint cup, air hose and a
small selection of acrylic paints (with colors geared towards the
automotive minded) are found in the box. |
|
 |
|
 |
|
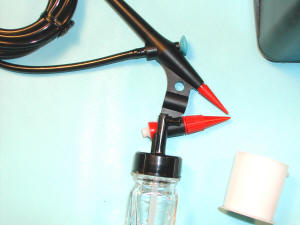
The tip is a snap fit unit that has 2 positions on the airbrush
body, the top position for “fine” and the lower for “broad” spray
patterns. The tip twists up and down to adjust paint flow and the
air flow is a set rate, controlled by depressing the actuator
button. Paint can be supplied either by a screw top, suction feed
bottle or siphon action paint cup. |
|
 |
|
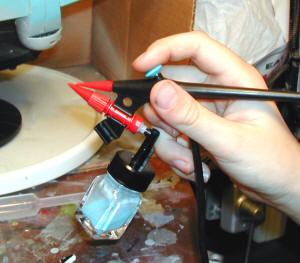
The body is a lightweight plastic with no removable parts other than
the spray tip. The paint bottle and siphon cup both plug directly
into the spray nozzle with a friction fit. The compressor is
reasonably quiet, though definitely not to be confused with a
“silent” model. It must be placed on the floor as it does vibrate a
pretty good amount which also adds to the noise factor. It’s nice
in that it does have it’s own on/off switch, rather than requiring
you to plug it in to turn it on. It also has a small, paint cup
sized recess in the top of the casing. I’m not sure if this is
designed to be used as a paint mixer, but can see where it would
probably work as one!!
The suction feed paint jars appear to be pulled directly from the
small ¼ oz bottle paint line.
Prior to the replacement airbrush parts arriving, I did plug in
the air compressor and attach the airline to the broken brush out of
curiosity. There was just enough of a nub sticking up from the air
release plunger to push down and get some air flow, though it was
painful on the finger tip. The air pressure appears to be approx 20
psi, as compared to what I get out of a regulated CO2 bottle, and
didn’t drop much between sprays. The air hose is a fairly stiff
black plastic material that’s not real easy to move around. The
ergonomics of the plastic bodied brush aren’t real comfortable for
my large hands, but do seem to fit pretty well in Andrew’s large 7
year old mitts. |
|
 |
|
Once the new airbrush body arrived (again, no replaceable parts so
the entire airbrush was replaced), I again plugged it into the air
compressor to see what it should actually feel like. Now a new
problem was encountered. The plunger seemed to come back up to the
top after spraying, but intermittently the air flow would not shut
down completely. I applied a small amount of Tri-Flow between the
plunger shaft and the airbrush body, which seemed to help some, but
still had occasions where the airflow wouldn’t shut down. Now onto
the test drive by Andrew (in his words, mostly)
Hi, my name is Andrew Howard and I am 7 years old. I go to first
grade at Lake Shore Elementary school. My dad started me building
models about a year ago and I’ve built about 6 since then. I’m
working on a very big one right now (a 1/32nd Revell. Tornado) and
it’s pretty fun but lots of work because there are a lot of pieces
to put together.
Dad got me the airbrush from IPMS USA to test out. I like the
airbrush and thanks for sending it. So far so good on the big
airplane I’m building, but we decided to test it on a biplane that
I’m also working on. |
|
 |
|
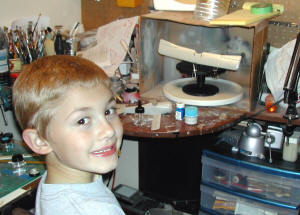
First me and Dad wiped off the top wing so it would be clean for
painting. Next we put the wing on a holder so I wouldn’t get paint
on my hands when I was painting the model. Now we were ready to mix
some paint to put on the Nieuport 17 (1/32nd scale also). I picked
the sky blue paint (Gunze acrylic) and Dad mixed some thinner with
it (91% ISO alcohol) and I stirred it up. The paint got poured into
the little bottle and stirred more. Dad told me about how I was
supposed to move the airbrush back and forth over the things I
wanted to paint while pushing down on the air button and we tried it
a few times before we put the paint bottle on. Before we started
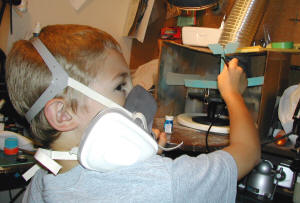
painting Dad also made me put on this funny mask so that I didn’t
get any of the colors in my lungs. |
|
 |
|
 |
|
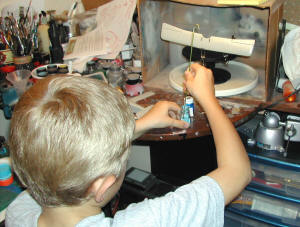
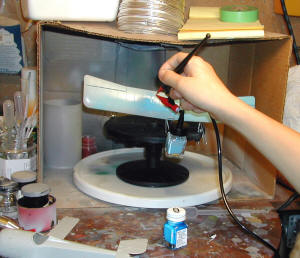
We turned on the fan in the painting box and then I got to start
really painting my airplane. At first I just held the button down
in one spot and the paint didn’t go on to well, but once I started
moving it around it got much better. We got to turn the red nozzle
until the paint came out just right and this was a little hard for
me. Dad told me when it looked right. A couple of times I forgot
to keep the bottle all of the way down and the paint quit coming out
but started again when I put the bottle back down. |
|
 |
|
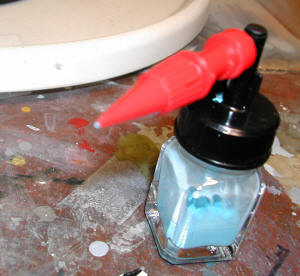
I started on the top wing and then we did the fuselage. I was doing
much better by the second part until the paint stopped coming out.
Dad had to pull the red part (spray nozzle) off of the airbrush and
clean off the gunked up paint. |
|
 |
|
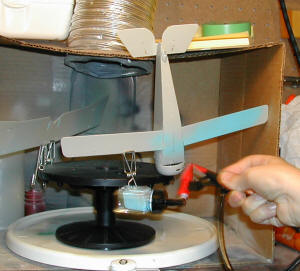
Once it was all put back together we got to paint some more. I
liked how the color went on the whole plane and I didn’t have to use
a real paint brush. |
|
 |
|
This was getting to be a lot of fun and I was getting better and
better at not making the paint blob up and run off of the airplane.
After we finished the fuselage and bottom wing Dad said it was time
to let the paint dry for a while before I could pick up the parts.
He showed me how to take the airbrush apart and clean up all of the
pieces that had paint on them. If you do this every time then it’s
all ready to go when you want to paint again. When the paint was
dry we looked at the model and it looked pretty good except for a
few spots where I got too much paint in that spot and it kind of ran
off. Now I can put the rest of the airplane together and then go
back to work on my Tornado. That one is really big and will take a
lot of paint to finish. It will be a lot easier now that I can
spray the paint on. Dad says that we can even try doing some
camouflage on it. That will be really cool ! I’m also supposed to
say “Thank you very much” to IPMS and Testors for letting me try the
airbrush out for them. Follow-up notes: Within 2 days of Andrew
using the airbrush, the air actuator button was again broken off of
the new unit when it fell to the floor.
The airbrush was easy to use and gave fair coverage once the
spray pattern and paint thinning ratios were properly adjusted.
Andrew is quick to catch on to how things work and he figured out
the entire system after a quick explanation from me. That
definitely makes this a product that’s very viable to the novice
modeler. Overall the concept of buying a complete airbrush package
for a low price is great, but I’d have to recommend this particular
airbrush with some hesitation due to the frailty of the air actuator
button. Thanks again to both IPMS USA and Testors for allowing
Andrew the opportunity to review this airbrush! |
|
Information, images, and all other items placed electronically on this site are the intellectual property of IPMS/USA ®. |
| |