|
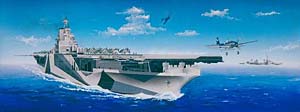
Part 2: Finished... |
|
 |
|
Pros:
Cons:
Kit Building Tips: Following the kit instructions did not lead to any problems (I usually alter the sequence of assembly, but not this time). However, there are a few pitfalls to be aware of. Followed order of assembly illustrated on page 6, but first glued bottom plate to Upper Hull II. Had to use accelerator in order to get the bottom plate to attach to hull. Glued stern hangar deck before the two other hangar deck pieces. Test fitted center hangar deck and found out will need to take care with the bow portion – trimmed a tiny piece off the starboard front corner to fit the hull. I figured that it was better to trim the straight edge forward than the curved area aft. Important: test fit the bow hull section and the Fore hangar deck piece before gluing these pieces, in order to make sure they will fit properly (Figure 2). To get the deck to fit properly, I had to leave a rather large gap between the bow hull and main hull sections (Figure 3). The gap was large enough to require rectangular plastic rod to fill (Evergreen 2x4 HO scale strips), and bending the plastic rod was part of the process. Much gap-filling cyanoacrylate with accelerator was used to fill the rest of the hull gap. Sanding this seam smooth was tricky because of the curvature of the hull and proximity of portholes. The center hangar deck was not flush with the stern hangar deck after the glue set – it was raised slightly at the junction. This will affect later assembly of the flight deck pieces. Fore hangar deck fit very nicely into the bow hull section. The hangar deck has detail molded unto it, so it is a shame to close it up. However, this gives the modeler the option to open some or all of the hangar side shutters in order to look into the hangar. However, for my model built OOB for review purposes, I chose not to open, paint or detail the hangar interior. Did not add H4 40mm gun director tubs or G13 directors yet since it will be easier to paint them before gluing to deck. Anchor chains were not included in the kit and I could not find any reference to them in the instruction booklet. I assume this is because they will be covered by the flight deck and its supports, as seen on page 12. Nevertheless, anchor chains were partly visible and so I added them. Model railroad chain was used, and cut to length. Followed instructions and added hangar sides all around hull. Pieces fit well, with the only seams due to previous misfits of the hangar deck. Port pieces needed to be shortened about 1/8” in order to fit, so best to dry fit the pieces all the way down the hull to make sure they will fit properly. Some seams remained and some differences in vertical heights were seen, but these can be sanded later. Sanded line were bottom plate met hull – interestingly, bottom plate does not have armor plate protrusion – a glaring error and making sanding difficult. Putty was used to fill in the missing armor belt and after drying, was sanded. Added strip styrene and thick CA glue to fill seams in hangar sides. When the hull and hangar sides are assembled, it is time to paint the ship (see Painting and Decals section below). The bridge was assembled at this time since it was a stand-alone project , along with the gun mounts fore and aft of the bridge. From photos, a platform that was not indicated for use in the instructions was actually on the ship, so will add that to port side of stack. This is also a good time to prepare, clean up and paint small pieces and platforms – 20mm guns, 40mm guns and bases, 5in guns and bases, liferafts, directors, etc. For the 20mm gun galleries, be aware that you may need to fill holes and drill new ones (as indicated in the instructions). Next on the list was the flight deck. I used a Dremel tool and sanders to cut the notch out of fore flight deck piece (the pattern was actually on the fore flight deck). Cleaned up flight deck pieces. Thinned WEM USN Flight Deck Stain 21 with paint thinner 2:1 (paint to thinner) and airbrushed flight deck pieces. Readied flight deck sections for assembly unto hull. Removed long tabs on all pieces, but kept short tabs. Dry fit all pieces, and decided to start from front and work backwards. Front flight deck piece was repeatedly dry fit, and vertical edges sanded smooth. Any sections prohibiting a tight fit were removed or sanded down. Even so, the best fit obtainable left much to be desired. A large gap between flight deck and vertical surface on port forward was filled with Evergreen strip styrene sections of various sizes in order to meet flight deck. Flight deck was glued with CA and clamping until dry. Several gaps between flight deck and hull vertical surfaces were filled with Evergreen strip styrene, and sealed with CA plus accelerator. For middle flight deck section, the side elevator guides had to be sanded down significantly to allow flush fitting of center section. Because the fit of forward section (itself a result of vertical side assemblies) was slightly on the diagonal, the center section was going to have a gap between the flight deck pieces. At least a good fit to vertical surfaces was found with center section. Used CA glue to attach center flight deck section. Aft flight deck section was also repeatedly dry fit, and adjustments made to vertical surfaces, but aft section was going to be higher than center section. After gluing aft section, a noticeable gap between center and aft section was visible, mostly due to height. Overall, flight deck sections depended strongly on placement of vertical surfaces, and left noticeable gaps between sections. Gaps between flight deck sections were then filled with a combination of Evergreen strip styrene and thick CA glue with accelerator. Other gaps between flight deck sections and vertical surfaces were filled similarly. In the meantime, work on the flight deck catwalks was ongoing. The port side catwalks and vertical surface of the flight deck section itself had numerous ejector pin marks. Since painting of flight deck and hull was already finished, it would be a monumental task to sand those confined areas (probably would have been a good idea to sand the offending areas before painting and assembly of flight deck sections). Solution was to use Evergreen strip styrene (HO scale 1X10) to plate over vertical and horizontal surfaces (Figure 9). This also would give a nice guide for future installment of railings. Starboard side had few catwalks, and vertical surfaces did not have ejector pin marks. Painstaking painting with several coats was needed to cover white strip styrene. Result was satisfactory. Assembled all remaining pieces to hull and flight decks, and model was ready for final detailing. I chose to build only one example each of a Hellcat fighter, Helldiver dive bomber and Avenger torpedo bomber since I wanted to add photo etch details in the future. Each aircraft assembled nicely, but seams around the tail need to be filled. Wings can be glued in extended or folded positions. Extra aircraft are available separately from Trumpeter and other companies. For this kit, the SBD Dauntless and Vought Corsair were not carried in Air Group 80, and thus, are a waste (but perfect for other Essex class carrier air groups). Assembled aircraft are attractive and look close to scale. Painting and Decals: I chose to use Model Master acrylic paints (mostly) for this kit. Ticonderoga was commissioned in Measure 33/10a with colors of 5-L light gray, 5-O Ocean gray and 5-N Navy blue on the vertical surfaces, Deck Blue 20-B on horizontal (deck) surfaces and Flight Deck Stain No. 21 (a medium blue that closely resembles 5-O). Polly S Ocean Gray 5-O was used instead of the Model Master version. These paints looked accurate for color and tone. With a surface area this large, airbrushing is greatly preferred for the bridge, hull and flight deck. I used Rubbing Alcohol (70% isopropyl alcohol) as the thinner and cleaner for Model Master acrylic paints, but not for Polly S paints (they need water for a thinner). When the hull and vertical hangar pieces were assembled, I airbrushed the entire ship with Light Gray 5-L. After this was dry, I masked the non-Navy Blue 5-N areas and airbrushed 5-N (Figures 4 & 5). Then I masked off the non-Ocean Gray 5-O areas and airbrushed 5-O (Figure 6 & 7). I painted the deck areas by brush with Model Master Deck Blue 20B, after an initial coat with White Ensign Models enamel 20B, which was a little darker than I liked. While the kit Painting Guide for the vertical surfaces appeared mostly accurate, I also consulted photographs and drawings in order to be more accurate with the complicated dazzle paint scheme. All undersurfaces and vertical surfaces hidden by other parts were painted 5-L. The bridge was masked for each color and either airbrushed or painted with 5-L, 5-O and 5-N (Figure 8). Be sure to paint the bridge camouflage pattern before adding the platforms and decks. Paint the platforms separately before adding them to the bridge. I airbrushed the flight deck pieces before assembly with White Ensign Models Flight Deck Stain 21B thinned with odorless thinner (Model Master Flight Deck colors were backordered from my sources). This paint looked like a good match compared to photographs. Do not use the darker blue flight deck stain as the kit Painting Guide recommended – this color was used for the post-kamikaze refit after March 1945, and was not used when Ticonderoga was in dazzle camouflage. Flight deck lines always present a hazard for modelers. Photos seemed to indicate a light gray color, but the kit decals were white. I used the kit decals, but there was only enough for the thin center line and one thicker dashed line, which I placed on the starboard side. I consulted photographs to determine the origin and end points of each dashed line. The spacing between dashes was close to actual, so I did not have to adjust the decals. Be sure to paint the dashed line areas with Future floor polish since the flight deck is rough. The decals can then be sealed with another coat of Future, followed by the clear flat coat later. The decal dashed lines look fine, even if a little bright. Next, I masked off the port side dashed line and masked off each individual dash. This only took one evening and was not as bad as it sounded. I used 5-L to dry-brush the dashes, and they looked suitably weathered and the right shade. Now I wished I did not use the decals, but it was too late to change. The flight deck numbers looked accurate. I did not apply decals to the elevators, since they were outlined by a thin gray line in photographs, instead of the black decals. All guns, directors and tubs were painted before addition to the model. Be sure to match the colors for vertical surfaces and matching 20mm mounts. Thus, 20mm mounts were 5-L, 5-O and 5-N. I painted all the 5in singles and 40mm guns and barrels 5-L with black springs. The rest of the mounts were Deck Blue 20B. Portholes, gun barrel tips and grills were colored with India ink from a drafting pen (0.030 size). Weathered black and Rust Floquil paints were used to dry-brush water and rust spots on the hull. The areas where the crew could reach was not weathered since they were constantly cleaning rust and grime. The flight deck was dry-brushed with Weathered black to simulate oil spots and also the tire skid marks from landing aircraft, mostly on the stern section, of course. Aircraft Painting and Decals: Air Group 80 deployed on the Ticonderoga’s first deployment (in dazzle camouflage) until the kamikaze attack in January 1945, when it shifted to other carriers (thus creating confusion about the identification markings). The squadron insignia was a slanted white line on both sides of the vertical tail, under the port wingtip and on the top of the starboard wing tip. Plane number was on the tail-plane, and small numbers on the cowling. The spinners on Helldivers were half white and half blue. A mixture of tri-color camouflage and all-glossy sea blue schemes was carried by Air Group 80. The instructions depict the tri-color scheme accurately. However, the inverted triangles for squadron markings on the decal sheet and box art belonged to Air Group 87 when Ticonderoga returned to action in May 1945 after repair of the Kamikaze damage. At this time, Ticonderoga was repainted into Measure 21 – all Navy Blue (5-N), and all aircraft were glossy sea blue. The kit recommends late-war aircraft markings on a pre-1945 ship and aircraft painting scheme, which is not accurate. Ignore the inverted triangle decals (or use them for a post-May 1945 Ticonderoga air group). I chose to build only one example each of a Hellcat fighter, Helldiver dive bomber and Avenger torpedo bomber since I wanted to add photo etch details in the future. I painted the darker upper surfaces with Polly S Weather Deck Blue, the medium color Polly S Ocean Gray (or Model Master Sea Blue 5-S on the Hellcat), and Model Master Light gray 5-L for the undersides. The cockpit and crew areas were painted Model Master Italian Olive Green (the closest color I had to chromate green), and a drafting pen was used to make black marks for gun ports, exhaust stubs, engine intakes and tires. Be sure to add a blackish walkway on the starboard wing root. The slanted white lines were either masked and painted with white paint, or white artist tape was used on the Hellcat. Painting is a better idea. Decals were applied over a Future floor polish coat, but the US insignia were too small and looked more appropriate for 1/700 scale. The tail number decals looked fine. Finally, the aircraft were finished with a brushed coat of Polly S Clear Flat acrylic paint. The aircraft actually look fine when completed, and can take some weathering and exhaust staining (which I did not do). Summary: The Trumpeter Ticonderoga CV-14 kit is a mixed bag. This was my first 1/350 scale kit, and after building it, I still prefer 1/700 scale. One popular feature of 1/350 scale warships is the larger size of pieces, a boon to beginners and those with fading eyesight or large fingers. On the other hand, 1/350 scale ships cry out for super detailing and photo etched parts, since they look more realistic. A 1/350 warship kit built out-of-box just looks too bare and plain to me. This kit is large, and presents difficulties for finding room to display it. The camouflage scheme for this carrier is striking, and it does look attractive. A straightforward build for this kit was forecast, and generally true, with a few major exceptions. The major trouble spots are filling the seams on the hull bow, flight deck and 5in turrets, rebuilding the waterline plate armor belt, and cutting out the flight deck notch. Ignore the Painting Guide and use paints from several companies that have the proper USN color designations. The major problem with this kit is the lack of shields for 20mm and 40mm gun mounts. Since these mounts are numerous and highly visible, this inaccuracy really makes this kit hard to recommend unless one plans to add after-market and photo etch gun shields. Other inaccuracies involved the wrong Painting Guide flight deck color (too dark), two 40mm mounts on port aft quarter which should not be there, a missing notch on the port flight deck and the wrong aircraft identification marking decals for the 1944 time period. These are inaccuracies that are obvious to anyone with reference photographs and materials. On the other hand, Trumpeter got more things right than wrong. This kit can be embellished into a very accurate and detailed model of the USS Ticonderoga before or after the January 1945 kamikaze event, or other long-bow Essex class carriers. However, aftermarket and photo etch sets will be needed to make this kit truly accurate and to fulfill its potential. Bottom line: reluctantly recommended but highly recommended only if additional photo etch sets are used to rectify the inaccuracies and add much needed detail for 1/350 scale. Out-of-the-box, this kit builds into a likeable, but inaccurate, depiction of the Ticonderoga. References: I used the following sources: Arnold GR. Warship Perspectives. Essex Class Aircraft Carriers in World War Two. WR Press, New York, 2002. Campbell J. Naval Weapons of World War Two. Conway Maritime Press, London, UK, 1985. 0-85177-329-X The Floating Drydock. United States Navy Camouflage 1 of the WW2 Era. Part 1. The Floating Drydock, Kresgeville, PA, 1976. ISBN: 0-944055-01-X The Floating Drydock. United States Navy Camouflage 2 of the WW2 Era. Part 2 Fleet Carriers. The Floating Drydock, Kresgeville, PA, 1976. (this book has been updated with more photos and is newly available on CD from Floating Drydock – CAMO2B00001, Sept. 2005) Friedman N. U.S. Aircraft Carriers. An Illustrated Design History. Naval Institute Press, Annapolis, MD, 1983. ISBN 0-87021-739-9 Kinzey B. TBF & TBM Avenger in Detail and Scale, Vol. 53, Squadron/Signal Publications, Carrollton, TX, 1997. ISBN 1-888974-06-0 Tillman B. Helldiver Units of World War 2. Osprey Combat Aircraft 3, Osprey Publishing, Botley, Oxford, UK, 1997. ISBN 1-85532-689-2 These sources also contain information on the Ticonderoga (some citations are not complete): Faltum A. The Essex Class Aircraft Carriers. Nautical & Aviation Publishing, 1996. ISBN: 1-877853-26-7 Raven A. Warship Design Histories: Essex-Class Carriers. Naval Institute Press , 1988. ISBN: 0-87021-021-1 Self C. The USS Hornet CV-12 - CVA-12 - CVS12. The Aircraft Carrier USS Hornet Foundation, Inc., 1995. ISBN: 1-56311-336-3 Smith M. Essex Class Carriers in Action. Warships Number 10, Squadron/Signal Publications, Carrollton, TX. ISBN: 0-89747-373-6 Stille M. US Navy Aircraft Carriers 1922-45. Osprey Publishing, Botley, Oxford, UK, 2005. ISBN: 1841768901. Terzibaschitsch S. Aircraft Carriers of the U.S. Navy, 2nd Edition. Naval Institute Press, Annapolis, MD, 1989. Tillman B. TBF/TBM Avenger Units of World War 2. Osprey Combat Aircraft 16, Osprey Publishing, Botley, Oxford, UK, 1999. ISBN: 1855329026 USS Ticonderoga CV-14 WWII-Vietnam. Turner Publications. Wiper S. USS Ticonderoga CV/CVA/CVS-14. Warship Pictorial #22, Classic Warships Publishing, 2004. ISBN 0-9745687-2-4 Websites: A Google® search will find many sites for information about the USS Ticonderoga, but my favorites are: www.navsource.org (excellent photo gallery) www.ibiblio.org/hyperwar/USN/ships/CV/CV-14_Ticonderoga.html (brief description) www.ibiblio.org/hyperwar/USN/ships/dafs/CV/cv14.html (history) www.history.navy.mil/photos/sh-usn/usnsh-t/cv14.htm (history and photo gallery) www.shipcamouflage.com (Snyder & Short’s website on official USN colors) Figures 11-19: Completed model. Pictures with blue background were taken outside in direct sunlight. Figures 20-23: Ticonderoga’s air group. One example of each aircraft carried was built with wings extended (Hellcat, Helldiver and Avenger). Figure 24: A taste of things to come – Tom’s Modelworks 1-350 scale Essex class photoetch set was used to provide shields and railings for one of the bow 40mm gun mounts. Compare to the out-of-the-box 40mm gun mount without shields immediately adjacent to it. The shields make the model look like the Ticonderoga really did look. |
|
) Trumpeter’s 1-350 kit of USS Ticonderoga showing box art, hull pieces and flight deck pieces |
) Hull assembled with hangar deck pieces in place. This assembly is important for a smooth fit between hangar deck pieces so that the flight deck will line up properly |
) Gap in hull bow because of mismatch of bottom plate and hangar deck pieces with main hull length |
Navy Blue (5-N) airbrushed on masked starboard side after painting entire hull Light Gray (5-L) |
|
Navy Blue (5-N) pattern after removal of masking tape |
Masking for Ocean Gray (5-O) pattern, starboard side |
|
Ocean Gray (5-O) pattern after masking removed. After touching up paint running under masking tape, the main camouflage pattern for the hull is done |
) After bridge structure is assembled, and before platforms were added, the bridge was masked and painted |
) Catwalks and vertical sides were covered with plastic strip (HO 1X10) to cover many injector pin marks (depressions). Notice the large seam between flight deck pieces |
) Masked flight deck dashes after dry-brushing with Light Gray (5-L). Compare to decals for other flight deck dashed lines, which are bright white. I recommend masking and painting the flight deck dashes, which is not as big a chore as it looks |
) |
) |
) |
) |
) |
) |
) |
) |
|
|
) |
) |
) |
) |
) |
|
|
|
|
Information, images, and all other items placed electronically on this site are the intellectual property of IPMS/USA ®. |
|